
Splitting a Code
"Inevitably, not all codes you produce will continue to prove useful. Some will be too general, others too specific to one or two segments of data (see Merging Codes). With the exception of contextual codes, a category that is so broad or so vaguely defined that it codes a very large number of passages or very lengthy passages is less likely to be useful in analysis" (Bazeley, 2013:185).
Splitting a code is necessary if you have been lumping together many quotations under a broad theme. This is a suitable approach for a first run through to get an idea about your data. At some point those codes need to be split up into codes with a lower number of codings or into subcodes of a category to be meaningful for analysis.
This can be done in two ways:
- Splitting into independent codes
- Splitting into subcodes (creating a category)
Splitting a code into independent codes
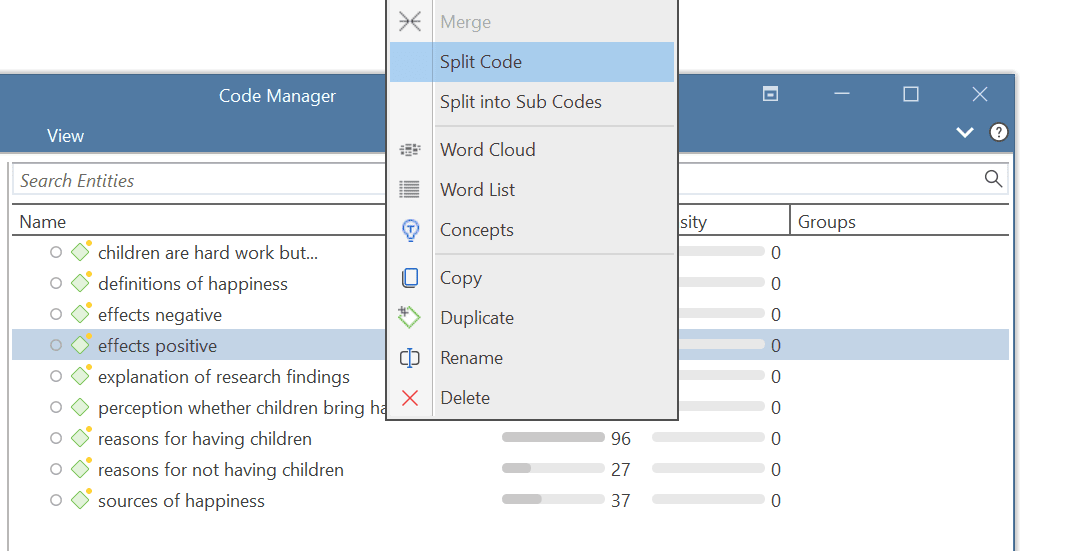
Select a code that you want to split in the Code Manager, and click the Split Code button in the ribbon. Or select a code in the Code Manager, Project Explorer or Code Browser, right-click and select Split from the context menu.
In the Split Code tool, you see the list of the quotations coded with the code.
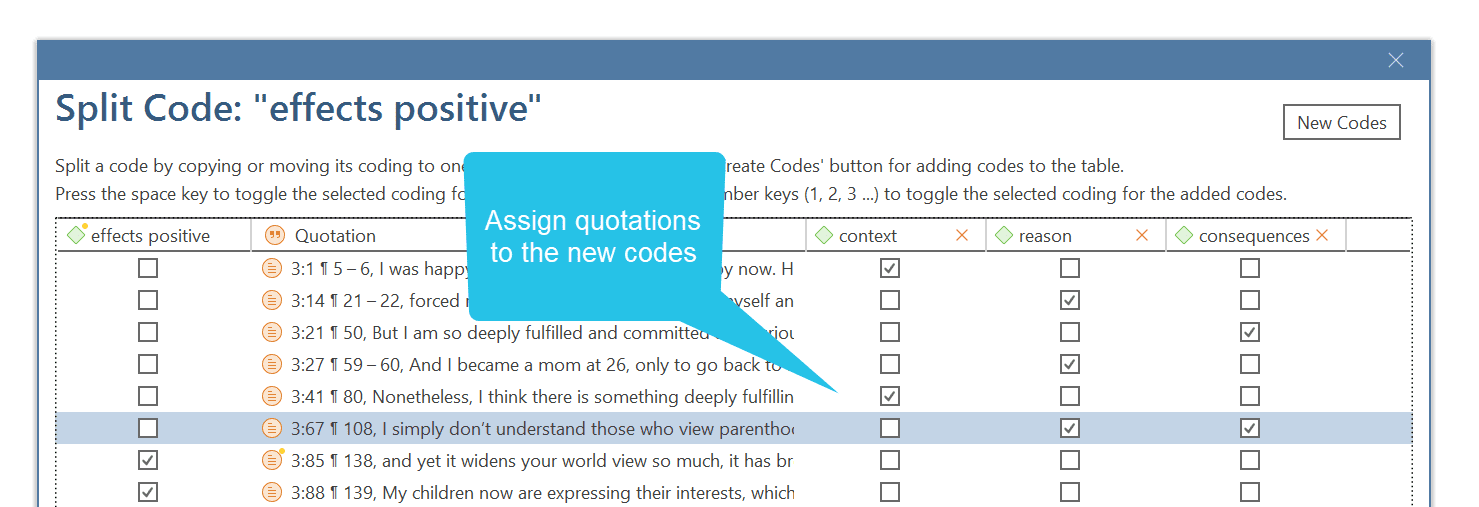
Click on New Codes to enter the labels for the subcodes. After entering the first code, press the down arrow to move to the next entry field to enter the second label, and so on. Once you are done, click on Create.

By default, the name of the original codes is added to the first column of the table. All quotations are still linked to it. The next step is to assign the quotations to the new codes you have created. If a quotation does not fit into any of these new codes, you can just leave it linked to the original code.
This is how you assign the quotations to one or more subcodes:
Select a quotation. Its content is shown at the bottom of the screen. Assign the quotation by clicking on the checkbox of the codes that apply. The quotation is automatically unlinked from the code that you are splitting.
To speed up the process, you can press the number keys (1,2,3, usw.) to assign the selected quotation to subcode 1, 2, 3, usw.
After you have distributed some or all of the quotations into sub codes, click on Split Code. Now the new codes are created, and the quotations are assigned accordingly.
It is not required that you assign all quotations to the new codes. Quotations can remain linked to the original code, or also to the original code and any of the newly created codes.
Options
-
Copy Comments: Select if you want all sub codes to have the same comment as the code you split.
-
Copy links: Select if you want all sub codes to inherit existing links to other codes or memos.
-
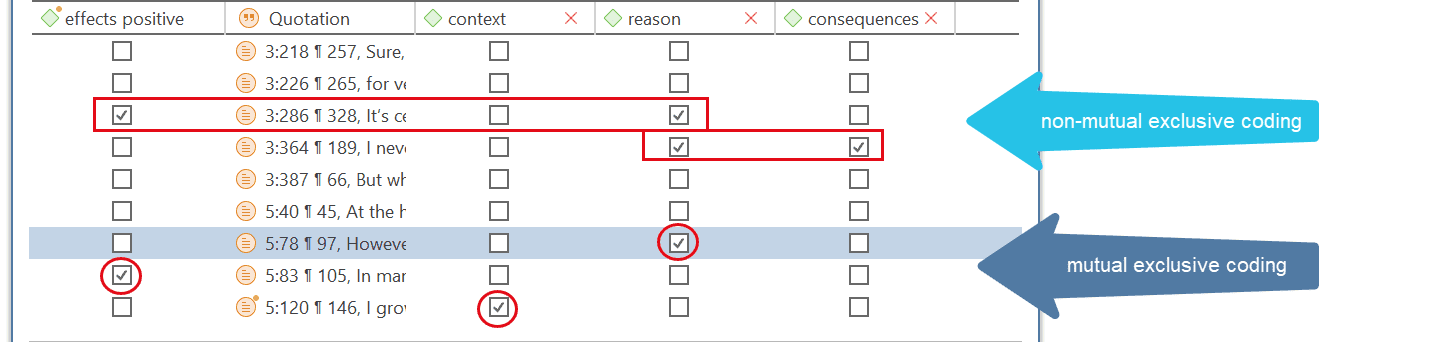
Mutually exclusive: If activated, you can assign a quotation to only one sub code. This is a requirement for some content analysis approaches and for calculating inter-coder agreement.
Mutually Exclusive Coding
If you do not want to allow that a quotation is coded with two of the codes, activate the option Mutually Exclusive. This is a requirement for some content analysis approaches and for calculating inter-coder agreement. See Requirements for Coding.
Splitting a code into a category and subcodes
Select a code that you want to split into subcodes.
Right-click and select the option Split into Subcodes, or click on the dropdown next to Split in the ribbon and select Split into Subcodes from there. The Split Code tool opens.
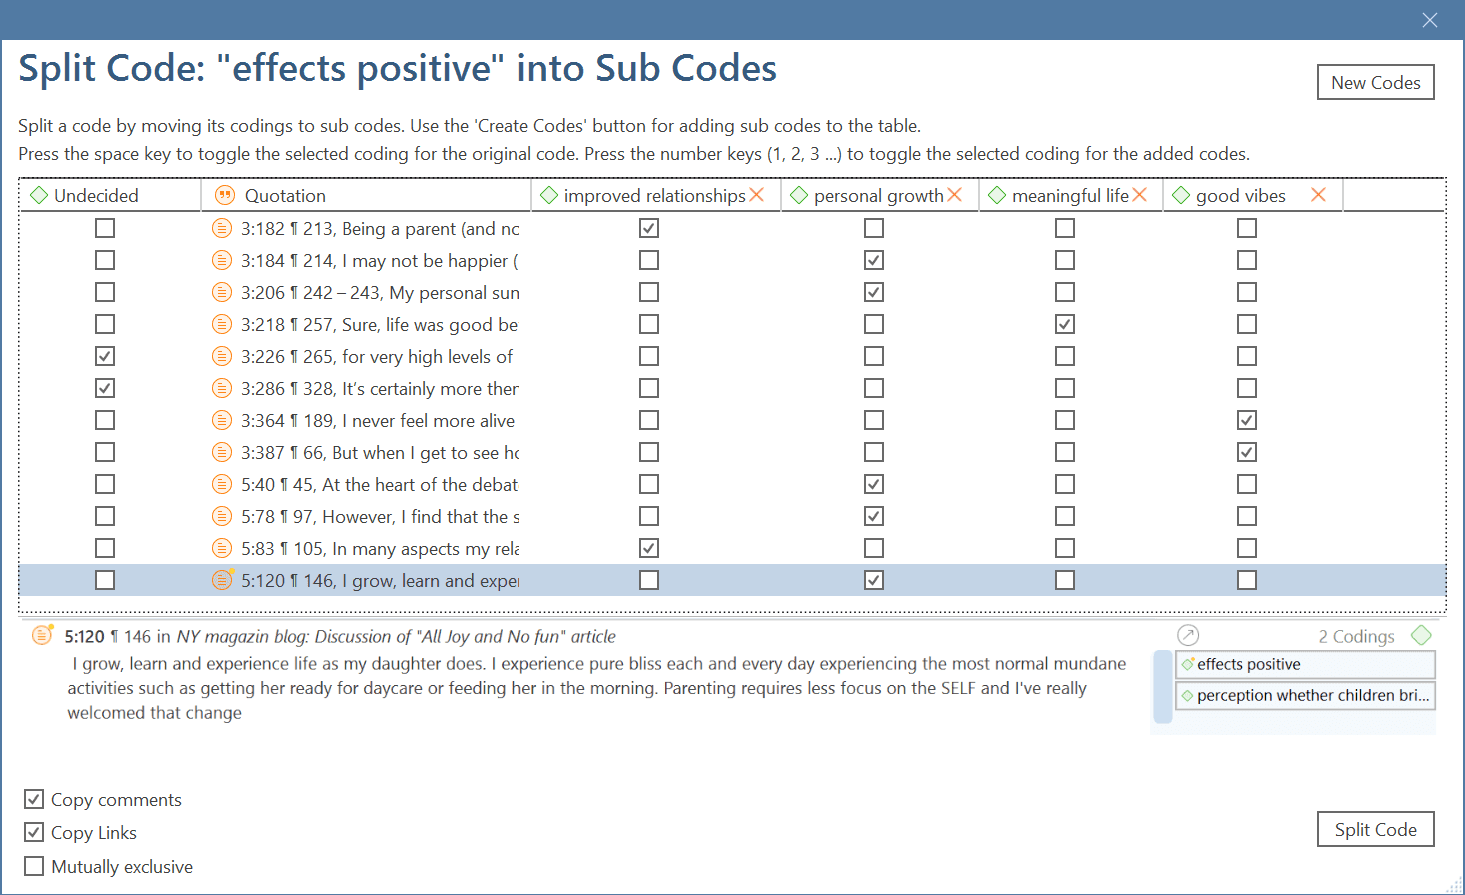
Click on New Codes to enter the labels for the subcodes. After entering the first code, press the down arrow to move to the next entry field to enter the second label, and so on. Once you are done, click on Create.
By default, a subcode with the name Undecided is added to the first column of the table. All quotations are added to this subcode. The next step is to assign the quotations to the new subcodes you have created. If a quotation does not fit into any of these subcodes, you can just leave it in the subcode 'Undecided'.
This is how you assign the quotations to one or more subcodes:
Select a quotation. Its content is shown at the bottom of the screen. Assign the quotation by clicking on the checkbox of the subcodes that apply. The quotation is automatically unlinked from the subcode 'Undecided'.
To speed up the process, you can press the number keys (1,2,3, usw.) to assign the selected quotation to subcode 1, 2, 3, usw.
Mutually exclusive: If you do not want to allow that a quotation is coded with two of the subcodes, activate the option Mutually Exclusive. This is a requirement for some content analysis approaches and for calculating inter-coder agreement. See Requirements for Coding.
Once all quotations have been assigned to one or more subcodes, click on Split Code. The code that you split will be turned into a category. This is indicated by the changed code icon. If you click on the drop-down arrow in front of the code, you can expand the category to see the subcodes.
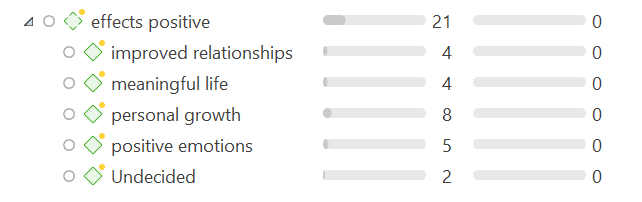
The groundedness of a category code is the number of quotations coded by all of its subcodes. Since you can apply several codes to the same quotation, the total for a category can differ from simply adding up quotations for all subcodes. Both sums are only equal, if you use subcodes in a mutual exclusive manner.