
Project Management
Opening a Project
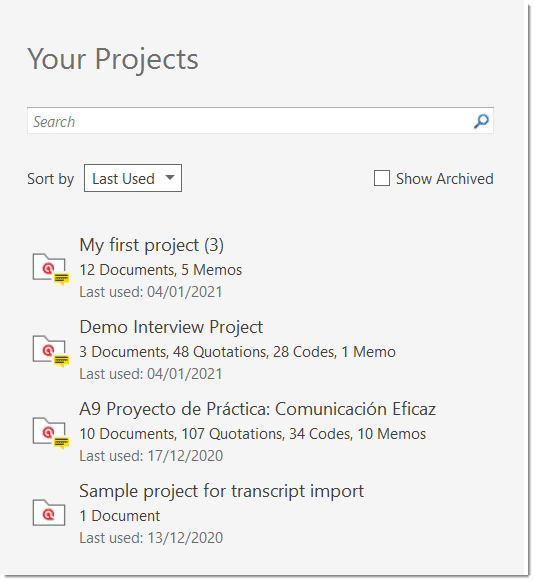
To open a project, click on a project in the list of projects on the Welcome Screen, or if a project is already open, and you want to open another one, select File > Open.
Creating a New Project
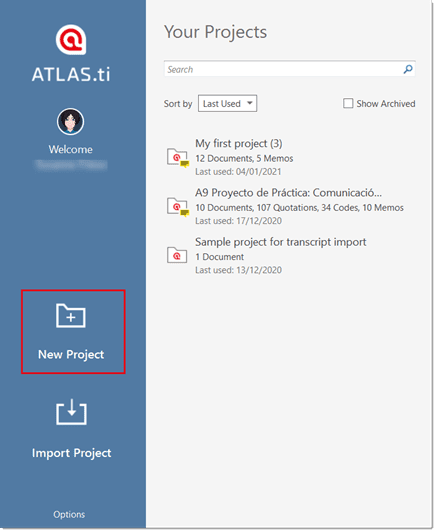
If you just started ATLAS.ti,
In the opening window on the left-hand side of the screen click on the button: Create New Project.
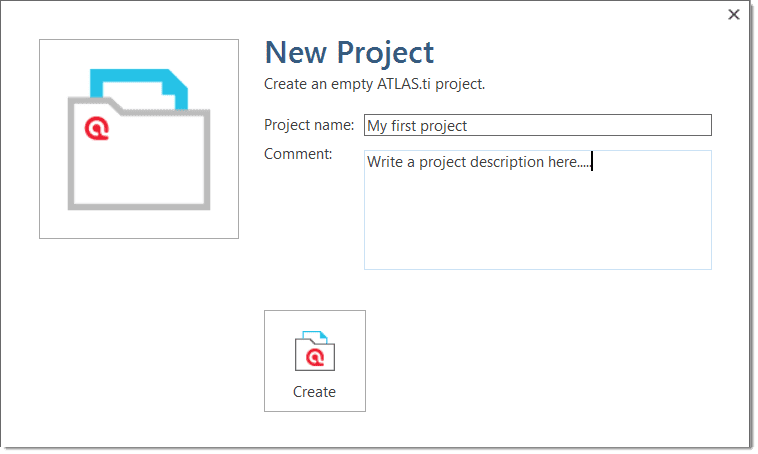
Enter a name for the project, optionally a comment, and click on Create.
If a project is already open,
click on File > New to open the backdrop. From there select Create New Project.
Enter a name for the project, optionally a comment, and click on Create.
Saving a Project
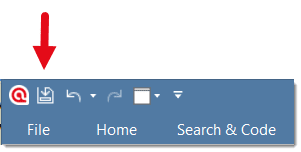
To save a project, click on the Save icon in the Quick Access toolbar, or select File > Save.
 The project is saved as internal ATLAS.ti file in the ATLAS.ti library. The default location for the library is the application folder on your computer. See Where Does ATLAS.ti Store Project Data?
It is possible to either change the default location for the ATLAS.ti library or to create new libraries. See About ATLAS.ti Libraries.
If you want to save an external copy of your project, you need to export it. See Project Export.
Renaming a Project
You can rename projects from the opening screen, either when you start ATLAS.ti or when closing all
To rename a project:
Select a project on the opening screen. Right-click on a project and select the option Rename Project.
Deleting a Project
You can delete projects from the opening screen, either when you start ATLAS.ti or when closing all
To delete a project:
Select a project on the opening screen.
inst
Right-click on a project and select the option Delete Project.
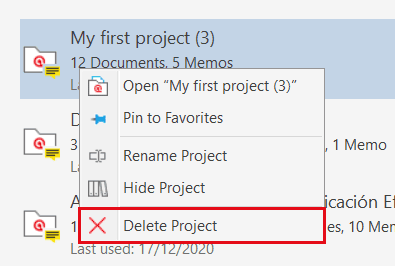
You will be asked to confirm the deletion as this is a permanent action that cannot be undone.
Creating a Project Backup
ATLAS.ti 9 projects cannot be used in previous versions.
Please export your projects on a regular basis and store the bundle files in a safe location. In case something happens to your computer, you still have a copy of your project to fall back on!
To create a backup of your project, you need to export it and save it as project bundle file on your computer, an external drive, a server or cloud location.
A project bundle file serves as external backup of your project independent of the ATLAS.ti installation on your computer.
-
The project bundle file contains all documents that you have added or linked to a project. In addition, it contains the project file with all codings, codes, memos, comments, networks, and links. Large audio, or video files can be excluded from the bundle.
-
Project bundle files are also used to transfer projects between computers. They can be read by both ATLAS.ti Mac and Windows. See Project Transfer.
-
If your project contains linked documents, they can be excluded when creating a project bundle file. See "Creating Partial Bundles" below.
Project Transfer
In order to transfer a project to a different computer, e.g., to share it with team members, you need to create a project bundle file. See above.
ATLAS.ti desktop project can currently not be imported into ATLAS.ti Web. It is however possible to import ATLAS.ti Web projects into the desktop version.
ATLAS.ti 9 projects cannot be used in previous versions.