Importing Survey Data
Select the Import & Export tab and then the Survey button.
Inst
Select the Excel file to be imported and click Open.
The import procedure starts. You see a progress report and ATLAS.ti informs you when the import is finished.
Inspecting Imported Survey Data
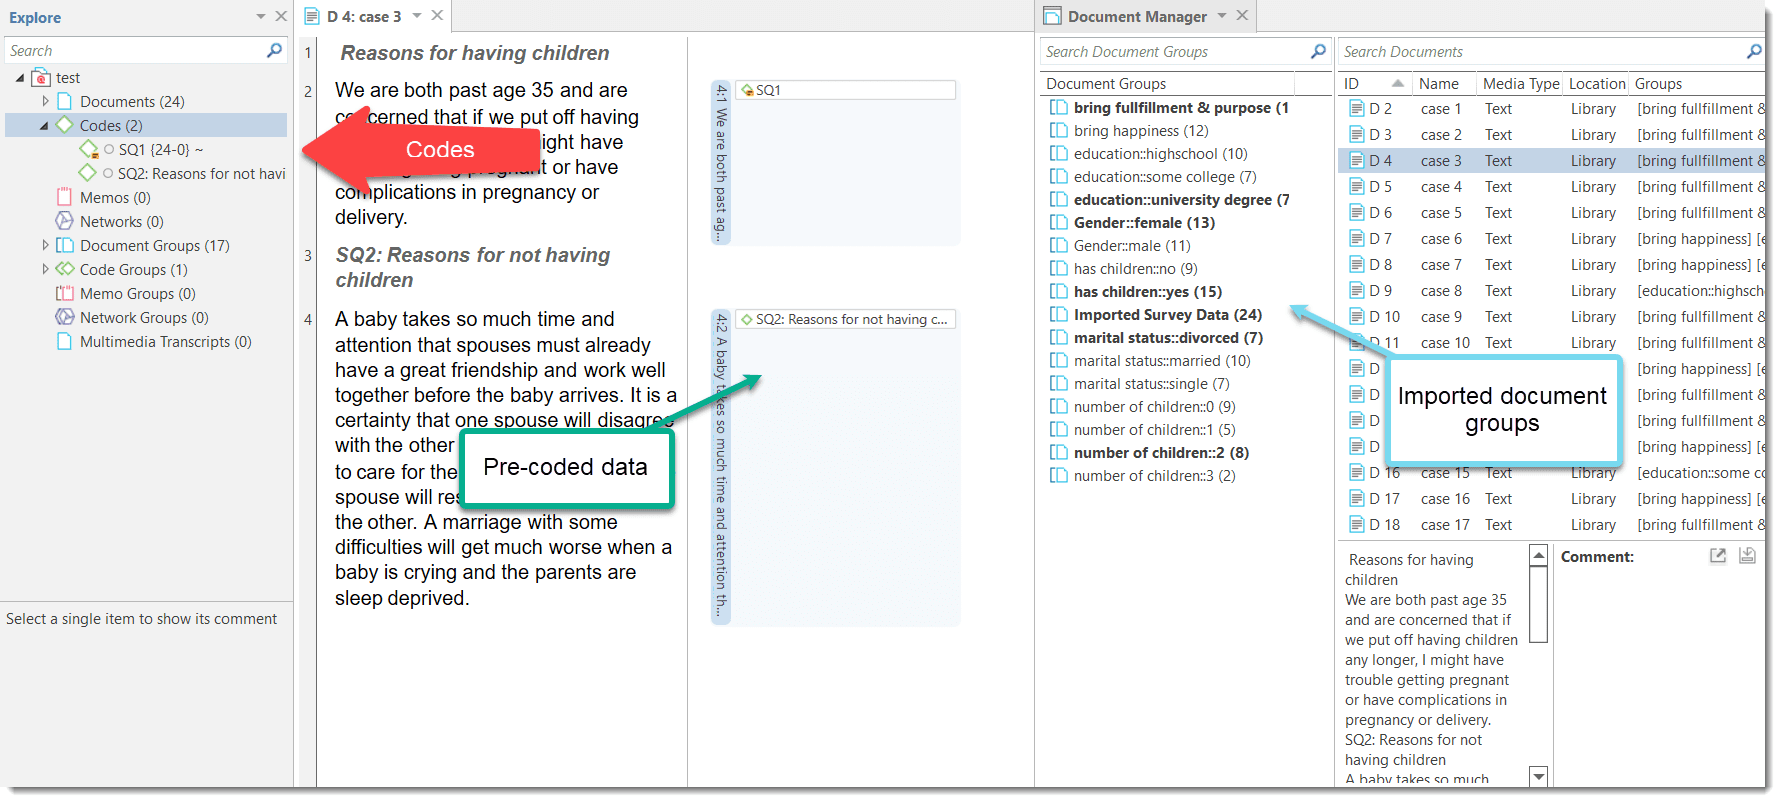
Open the Document Manager and take a look at what has been added to the project:
Document names: If you do not specify a name for each case, the default is case 1, case 2, case 3 and so on. In the example shown here, the name/synonym of each respondent was known and entered as author.
Document groups: Based on the information provided in the Excel table, document groups are created. The highlighted respondent 'case 6' in the example has some college education, is a female, single, and has no children. She answered the question: 'Do children bring happiness' with yes.
ATLAS.ti automatically creates a group that contains all survey data in case you work with data from multiple sources.
If your data comes in waves, you can add the data to the same data and import it again. ATLAS.ti will only import the new information.
You can only import new cases (i.e. rows in Excel), but not new questions (i.e., columns in Excel).
Data: The document text for each case consists of the answers to the open questions. Each answer is automatically coded with the information provided in Excel. The code can just be the question number or a longer label.
As you can see in the example, the first code name is just the question number SQ1. The full question can be seen in the comment. the second code name contains the full question. It is recommended to only use a short label for the code, as it also occurs in the body of the text. When creating word clouds and word lists, these words are also counted and mess up the results. See Preparing Survey Data for Import for further information.