
Preparing your Own Transcript
A multimedia transcript in ATLAS.ti consists of two documents: an audio or video file plus an associated transcript. The first step is to add the audio or video file to a project. Then you can associate one or multiple transcripts with the document.
It is not yet possible to set timestamps in ATLAS.ti Windows. You can only view existing timestamps if you import transcripts from other sources like automated transcripts prepared by Teams or Zoom.
Step 1 - Add a Audio or Video File
To add an audio or video file: click on the Add Documents button in the Home ribbon; or select the link option from the dropdown menu: Add Documents > Add Linked Video/Audio.
For more information see: Add a multimedia file to your project.
Step 2 - Create a Word file
Create a new document in Word and save it under a meaningful name like "TR _Tim Miller_m_t_south_58"
(TR = transcript; Tim Miller = interviewee name or pseudonym; m = male; south = from region south; 58 = age 58).
Step 3 - Associate the Word File
Load the multimedia document, select the Tools tab in the toolbar, and from there Import Transcript. Select the Word document that you have prepared in step 2.
The transcript will be imported into the project and loaded next to the multimedia file, and you see a new entry in the Project Explorer under the Multimedia Transcripts branch.
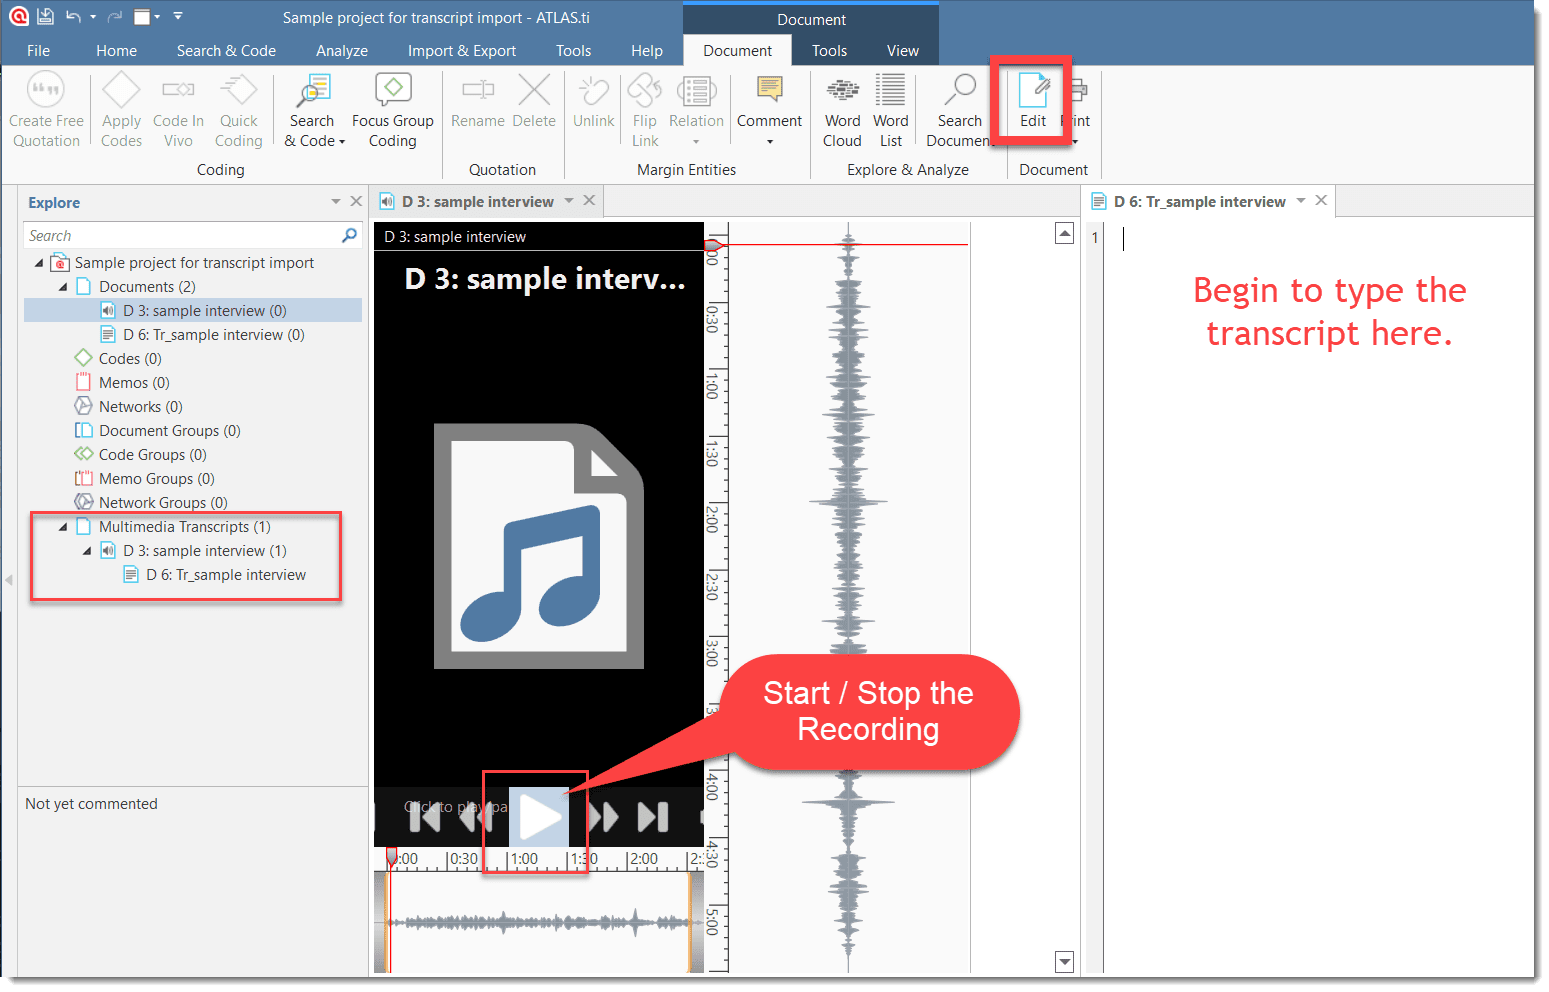
Step 4 - Begin to transcribe
Click on the Edit button.
Start the recording by clicking on the Play button, and listen to as much as you can remember. Stop the audio or video recording.
Start typing the transcript in the space on the right-hand side.
Repeat.
Click on the Save button in the edit toolbar from time to time. When you close the edit mode without saving, ATLAS.ti will remind you.
In the future, you will also be able to set timestamps that synchronize the audio/video file with the transcript. This is currently only available in the ATLAS.ti Mac version.