
Creating Quotations in Text Documents
When you code data, quotations are created automatically. See Coding Data.You can however also create quotations without coding. To do so:
Highlight a section in your text, right click and select the option Create Quotation. Alternatively, you can also use the shortcut cmd+H.
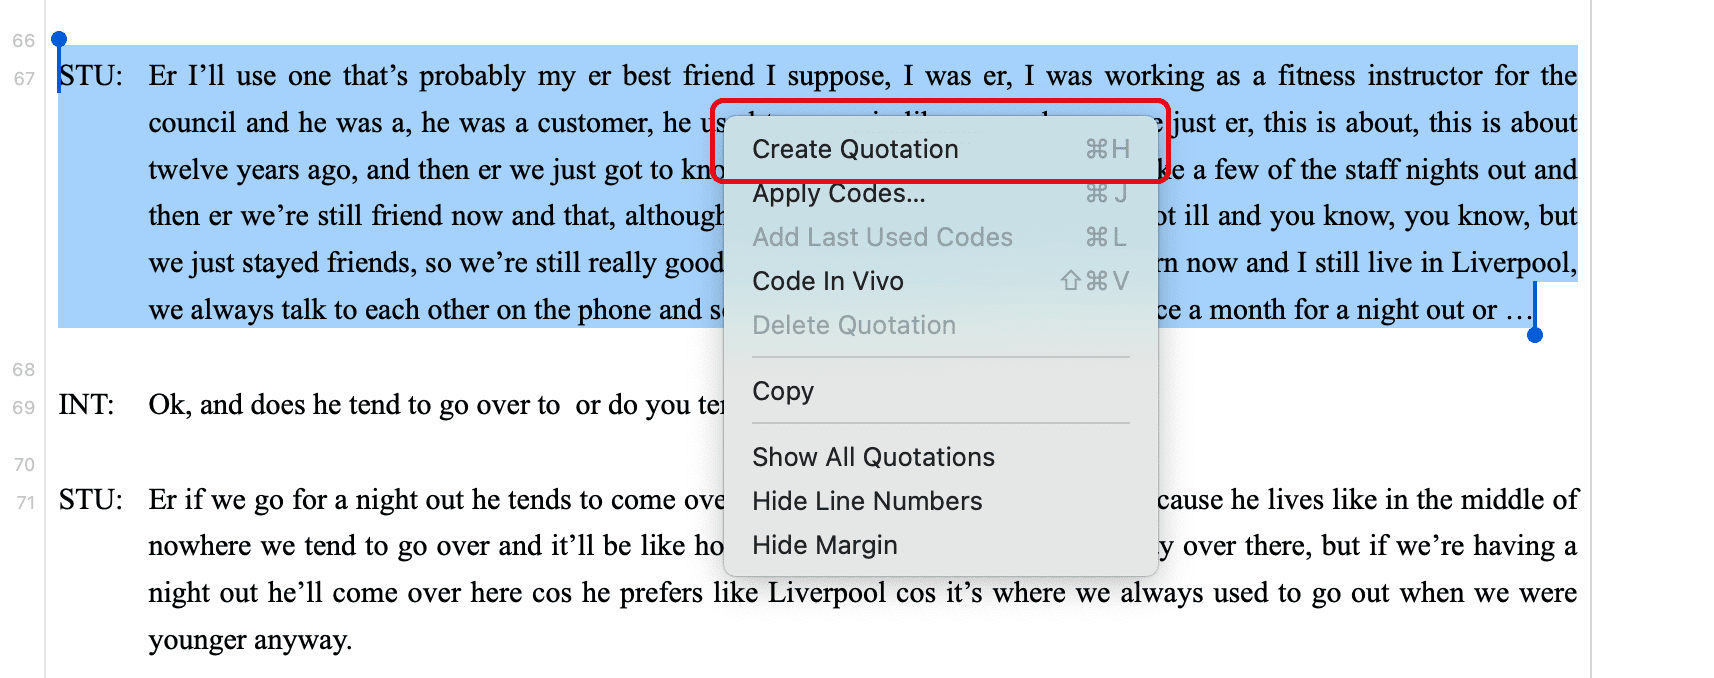
Once a quotation is created, you see a blue bar in the margin area and an entry in the Quotation Manager and the Document tree in the Project Explorer.
Creating Quotations in PDF Documents
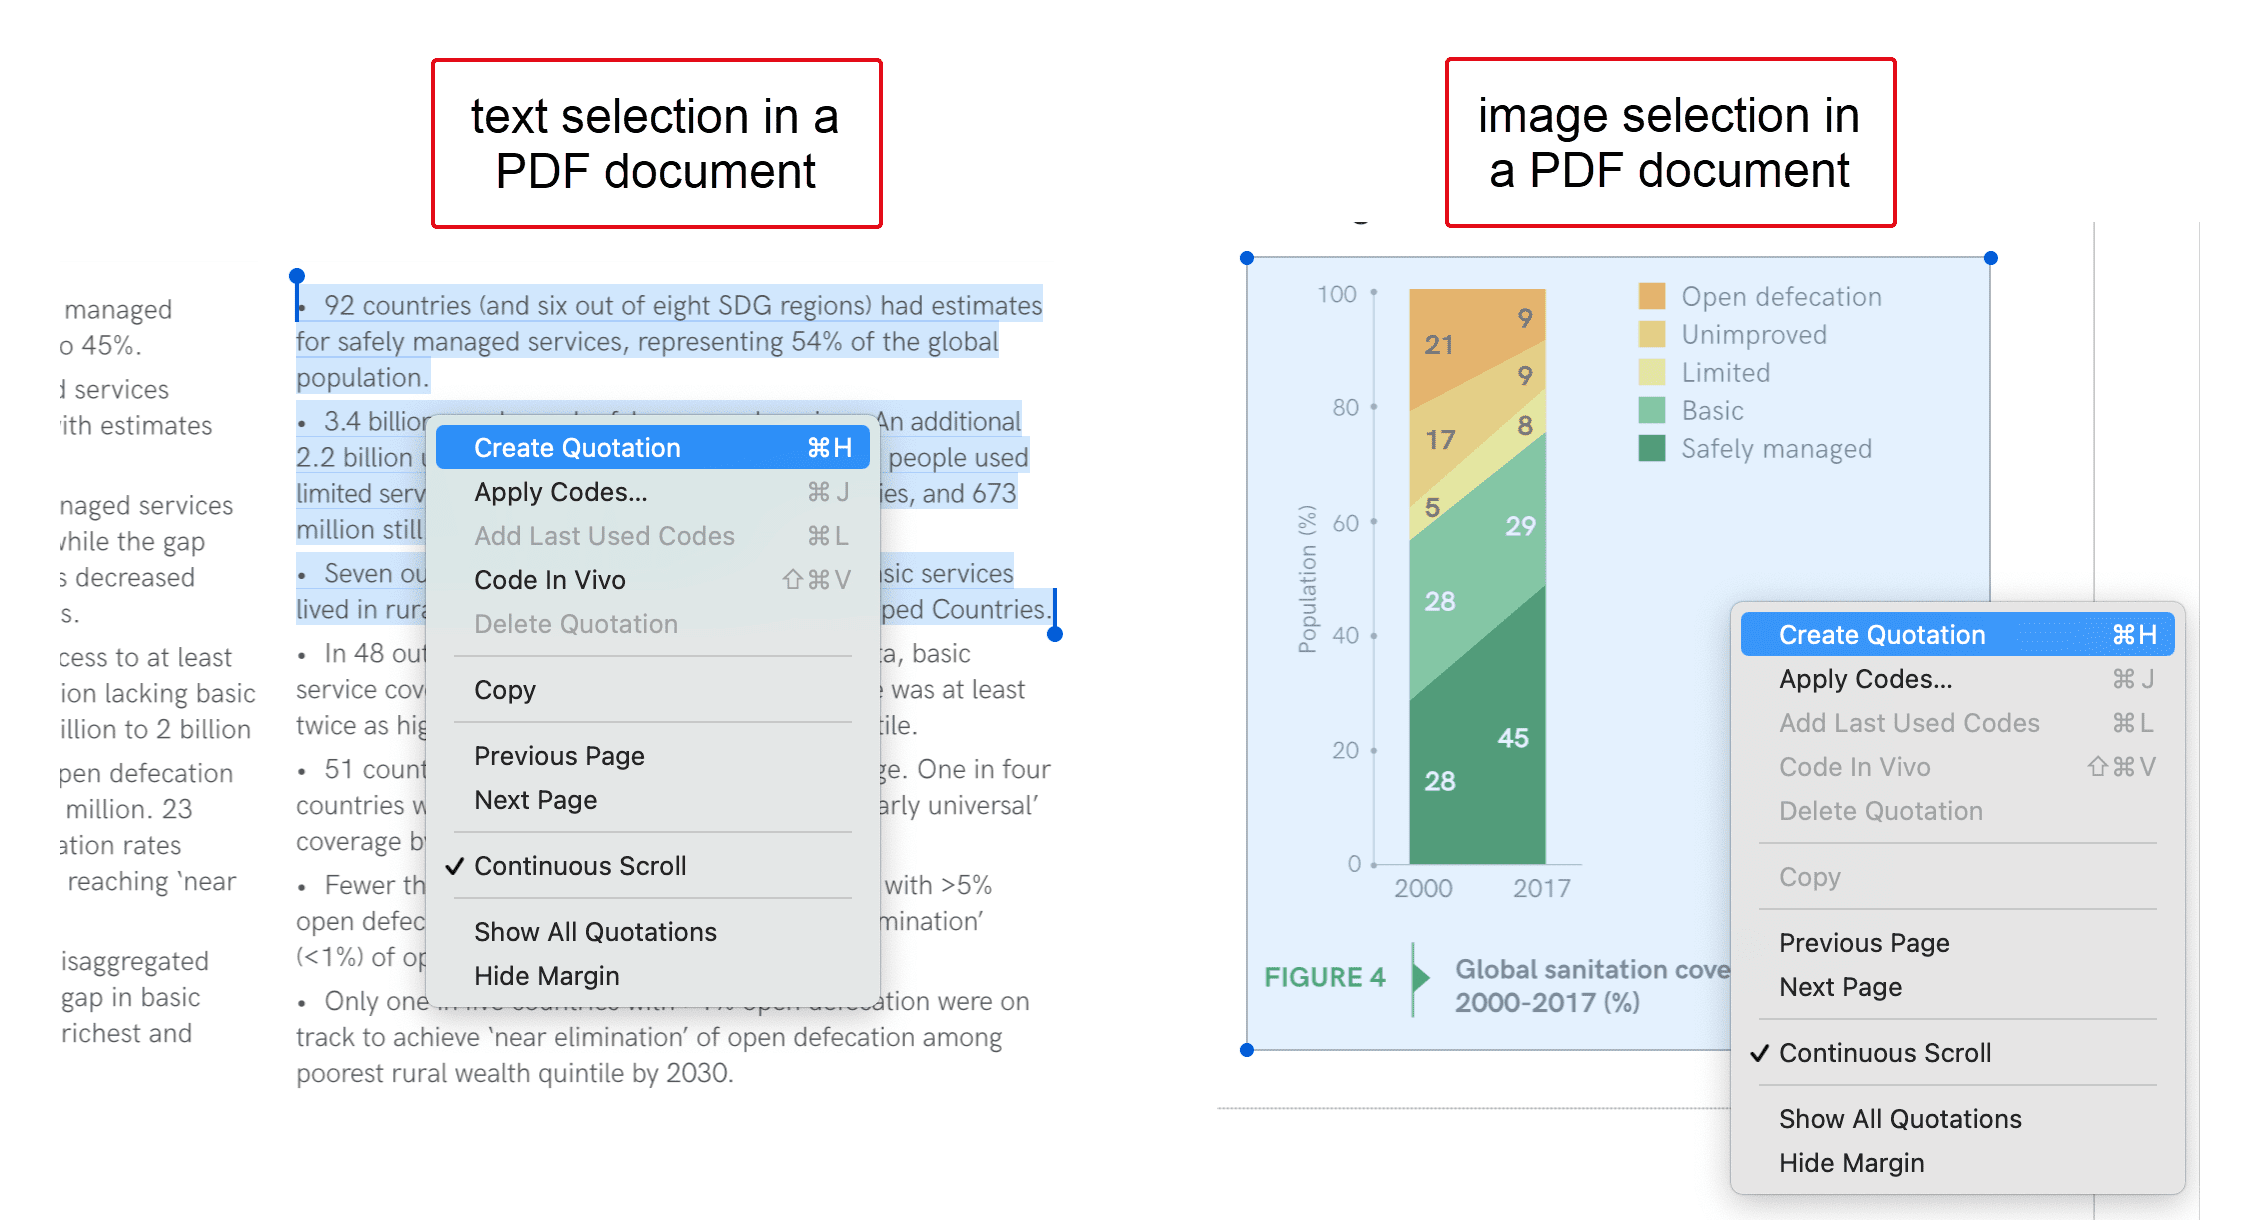
A text PDF file can contain images as well, like picture, graphs or tables. In ATLAS.ti you can create quotations for text and images in PDF documents.
Text selection: Select the text just like you do in a Word file. Make sure that you place the cursor right next to a letter.
Selecting a graphical element: Like selecting an area in a graphic file, draw a rectangular area with your mouse. See also Creating Graphic Quotations.
Select a segment in the PDF document, right click and select the option Create Quotation. AAlternatively, you can also use the shortcut cmd+H.
PDF files can be text or image files. Sometimes users accidentally add an image PDF and wonder why they can only create graphic quotations and cannot select text. If this happens, you need to re-create the PDF file, e.g. by letting an OCR scanner running over your PDF image file. In a lot of PDF creators these days this is an option in the software, no additional physical scan is needed.
Modifying Quotation Boundaries
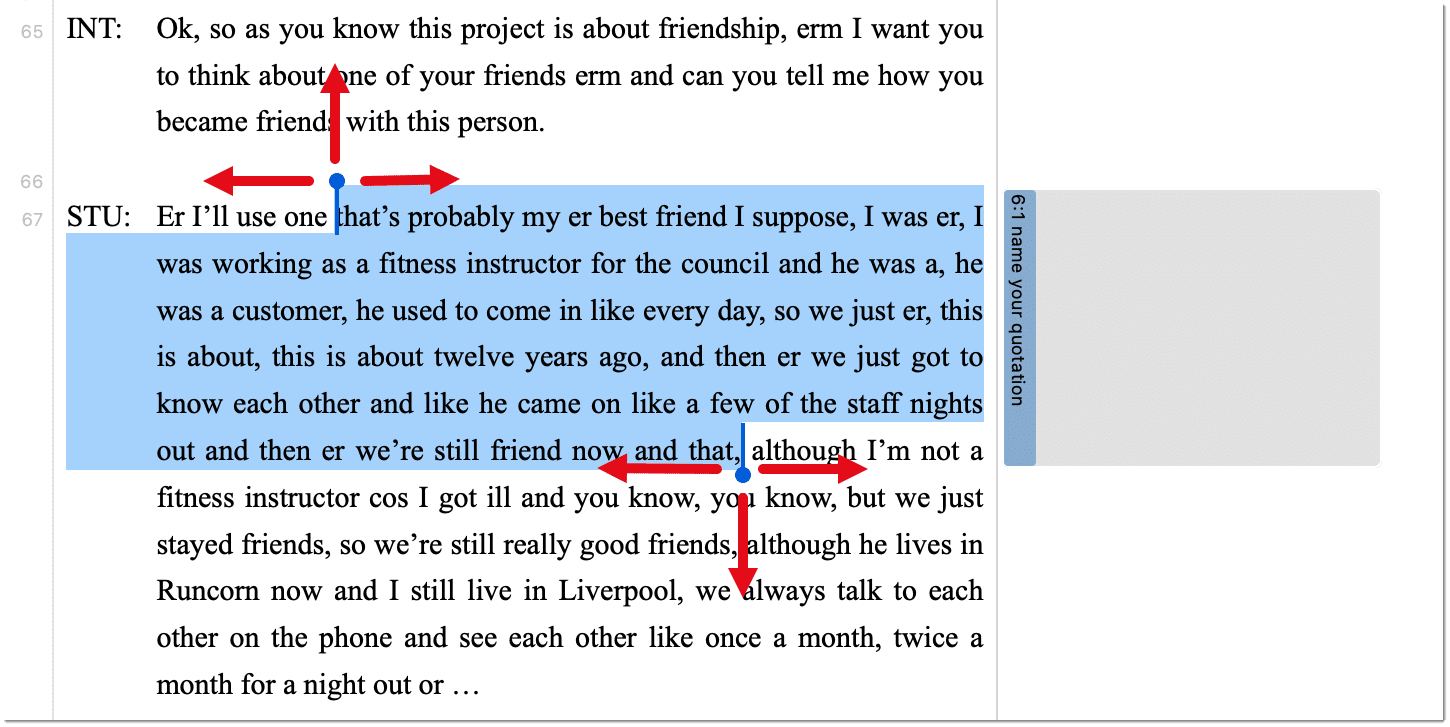
Modifying the length of a quotation is easy.
If you select a quotation, e.g. by clicking on the bar in the margin area, you see a blue line with a dot at the beginning and at the end of the quotation. Move the start or end position to a different location depending on whether you want to shorten or lengthen the quotation. This applies to all media types.
Quotation ID and Reference
Each quotation has an ID, which consists of two numbers:

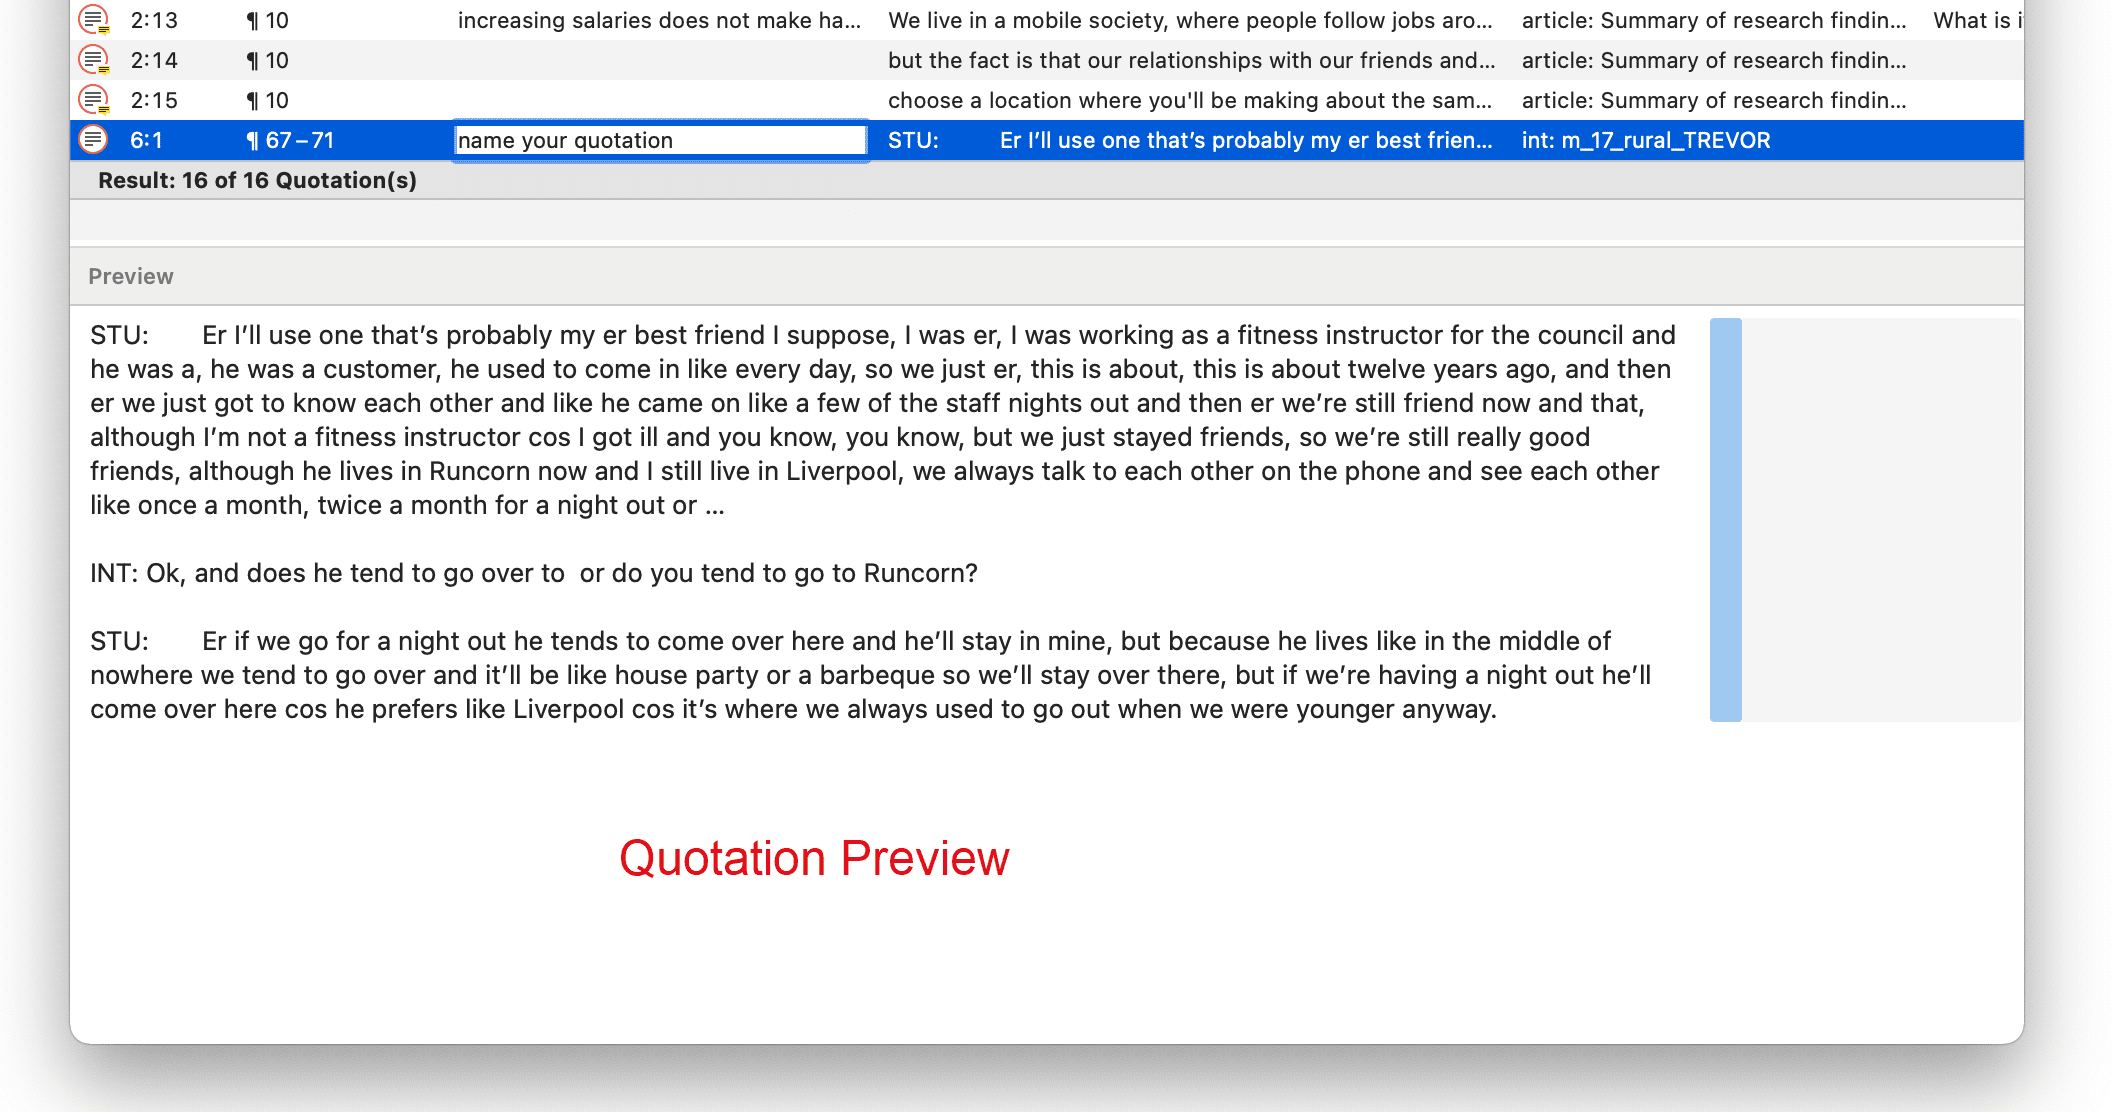
The ID 2:15 for example means that the quotation comes from document 2, and it is the 15th quotation that was created in this document. It is located in the 10th paragraph. Quotation 6:1 comes from document 6; it is the first quotation created in document 6 and can be found in paragraph 67-71.
Quotations are numbered in chronological and not in sequential order. If you want to change this order, see Working with Quotations.
Adding Quotation Names and Writing Comments
Being able to name each quotation has a number of useful applications.
- It allows you to quickly glance through your quotations in list view.
- You can use the name field to paraphrase a quotation as required by some content analysis approaches, or to write a short summary.
- You can use the name field for fine-grained coding (line-by-line Grounded Theory coding; initial coding in Constructive Grounded Theory, or as required by other interpretative approaches) instead of applying codes. If you already apply codes during this phase, you will end up with too many codes that are useless for further analysis. See Building a Code System.
- Adding titles to multimedia quotations. Seee Working with Multimedia Data.
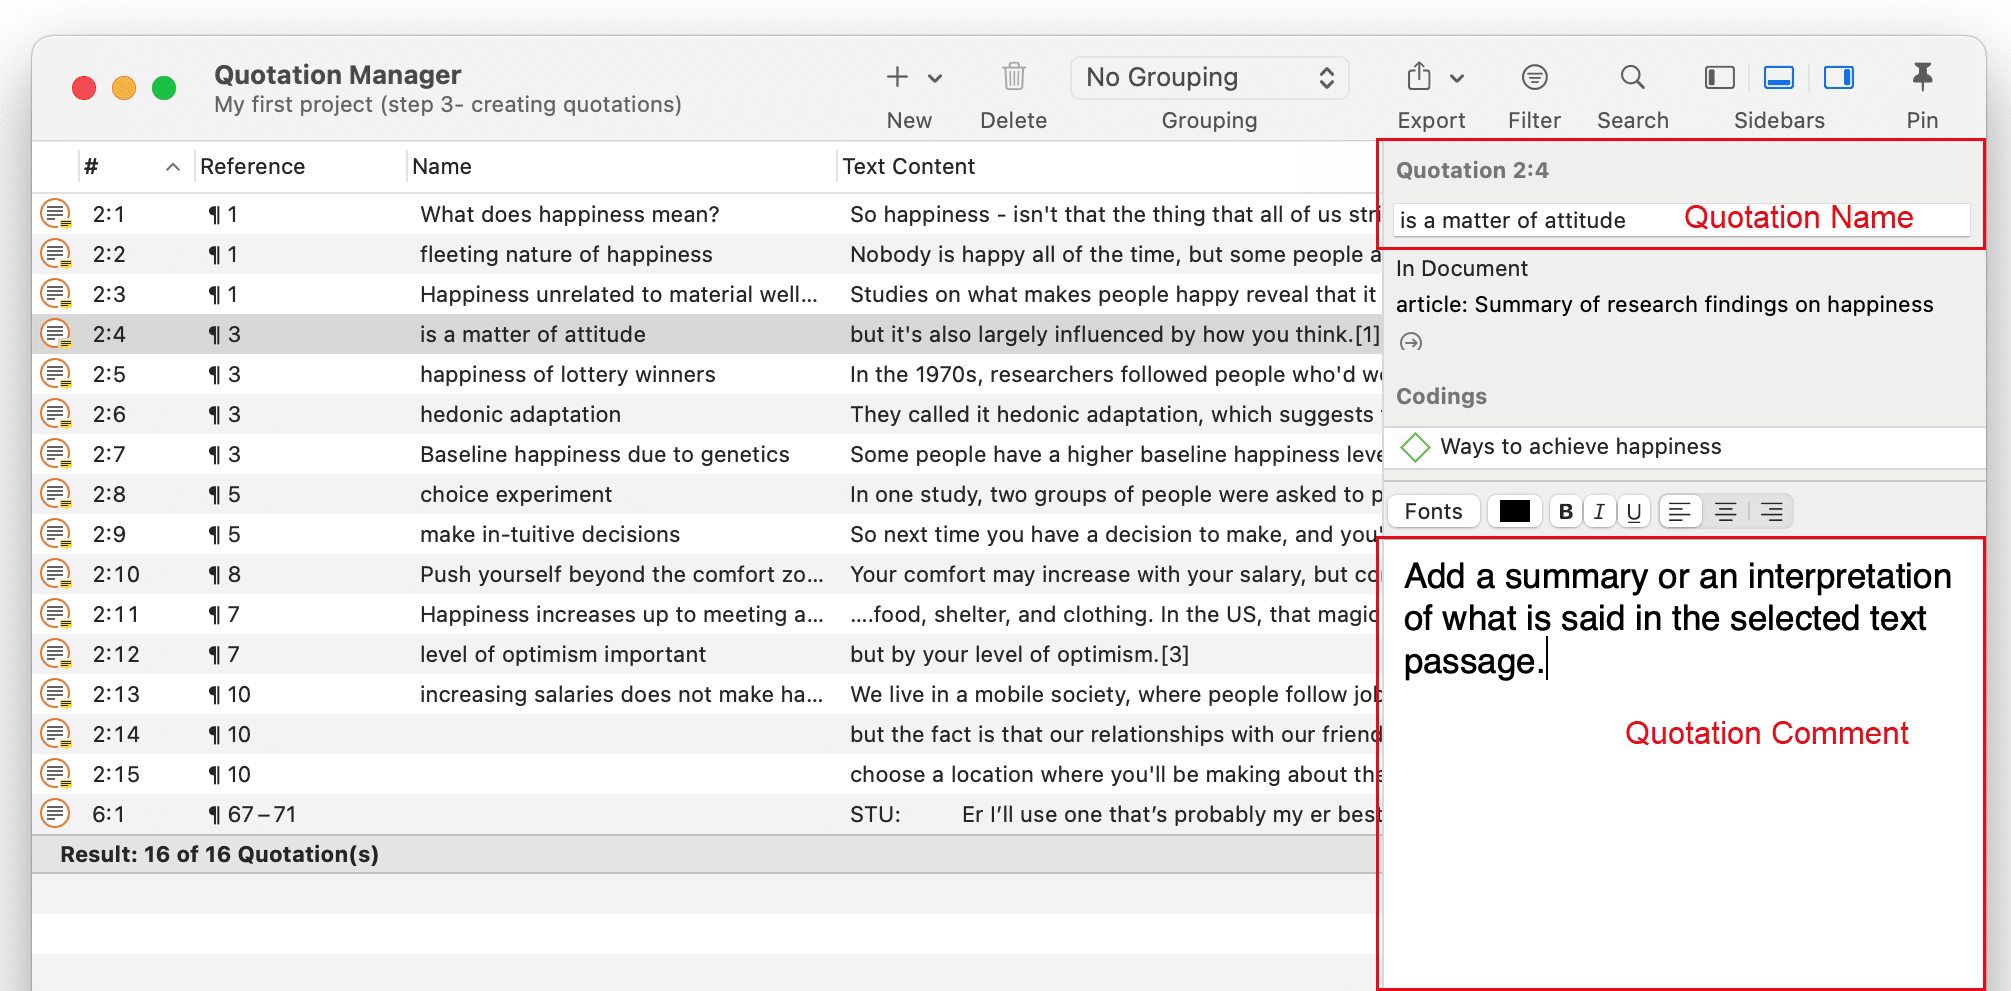
To add a name to a quotation, select it and left-click the name field, or add a text to the name field in the inspector on the right-hand side. You can write furhter infomation about the quotation like a summary or interpretation in the comment field that you also find in the inspector.
If you select a quotation in the Quotation Manager, you see a preview of the quotation in the panel below the quotation list. This applies to all data file formats.
How to create quotations in audio and video documents, see Creating Multimedia Quotations.
How to create quotations in image documents, see Creating Image Quotations.