
Importing Transcripts in RTF or Word format
A multimedia transcript in ATLAS.ti consists of two documents: an audio or video file plus an associated transcript. The first step is to add the audio or video file to a project. Then you can associate one or multiple transcripts with the document.
The different transcription programs use various formats for time stamps. ATLAS.ti supports the following:
| Transcription Software | Format of time stamps |
|---|---|
| Easytranscript, f4 & f5transcript | #hh:mm:ss-x# |
| Transcribe | [hh:mm:ss] |
| HyperTRANSCRIBE, Inqscribe, Transcriva | [hh:mm:ss.xx] |
| HyperTRANSCRIBE, Inqscribe, Transcriva | [hh:mm:ss.xxx] |
| Transana | (h:mm:ss.xx) |
| Transcriber Pro | hh:mm:ss |
This is how you import an existing transcript:
Step 1 - Add an Audio or Video File
To add an audio or video file: select Document > Add Documents; or select the link option: Document > Reference External Multimedia Document from the main menu.
For more information see: Add a multimedia file to your project.
Step 2 - Associate a Transcript
Load the multimedia document, open the drop-down menu for Transcripts in the toolbar, and select Import Transcript.
inst
Select the transcript that belongs to the audio or video file and click Open. Common file formats for transcripts with time stamps are rtf, vtt, srt or Word documents.
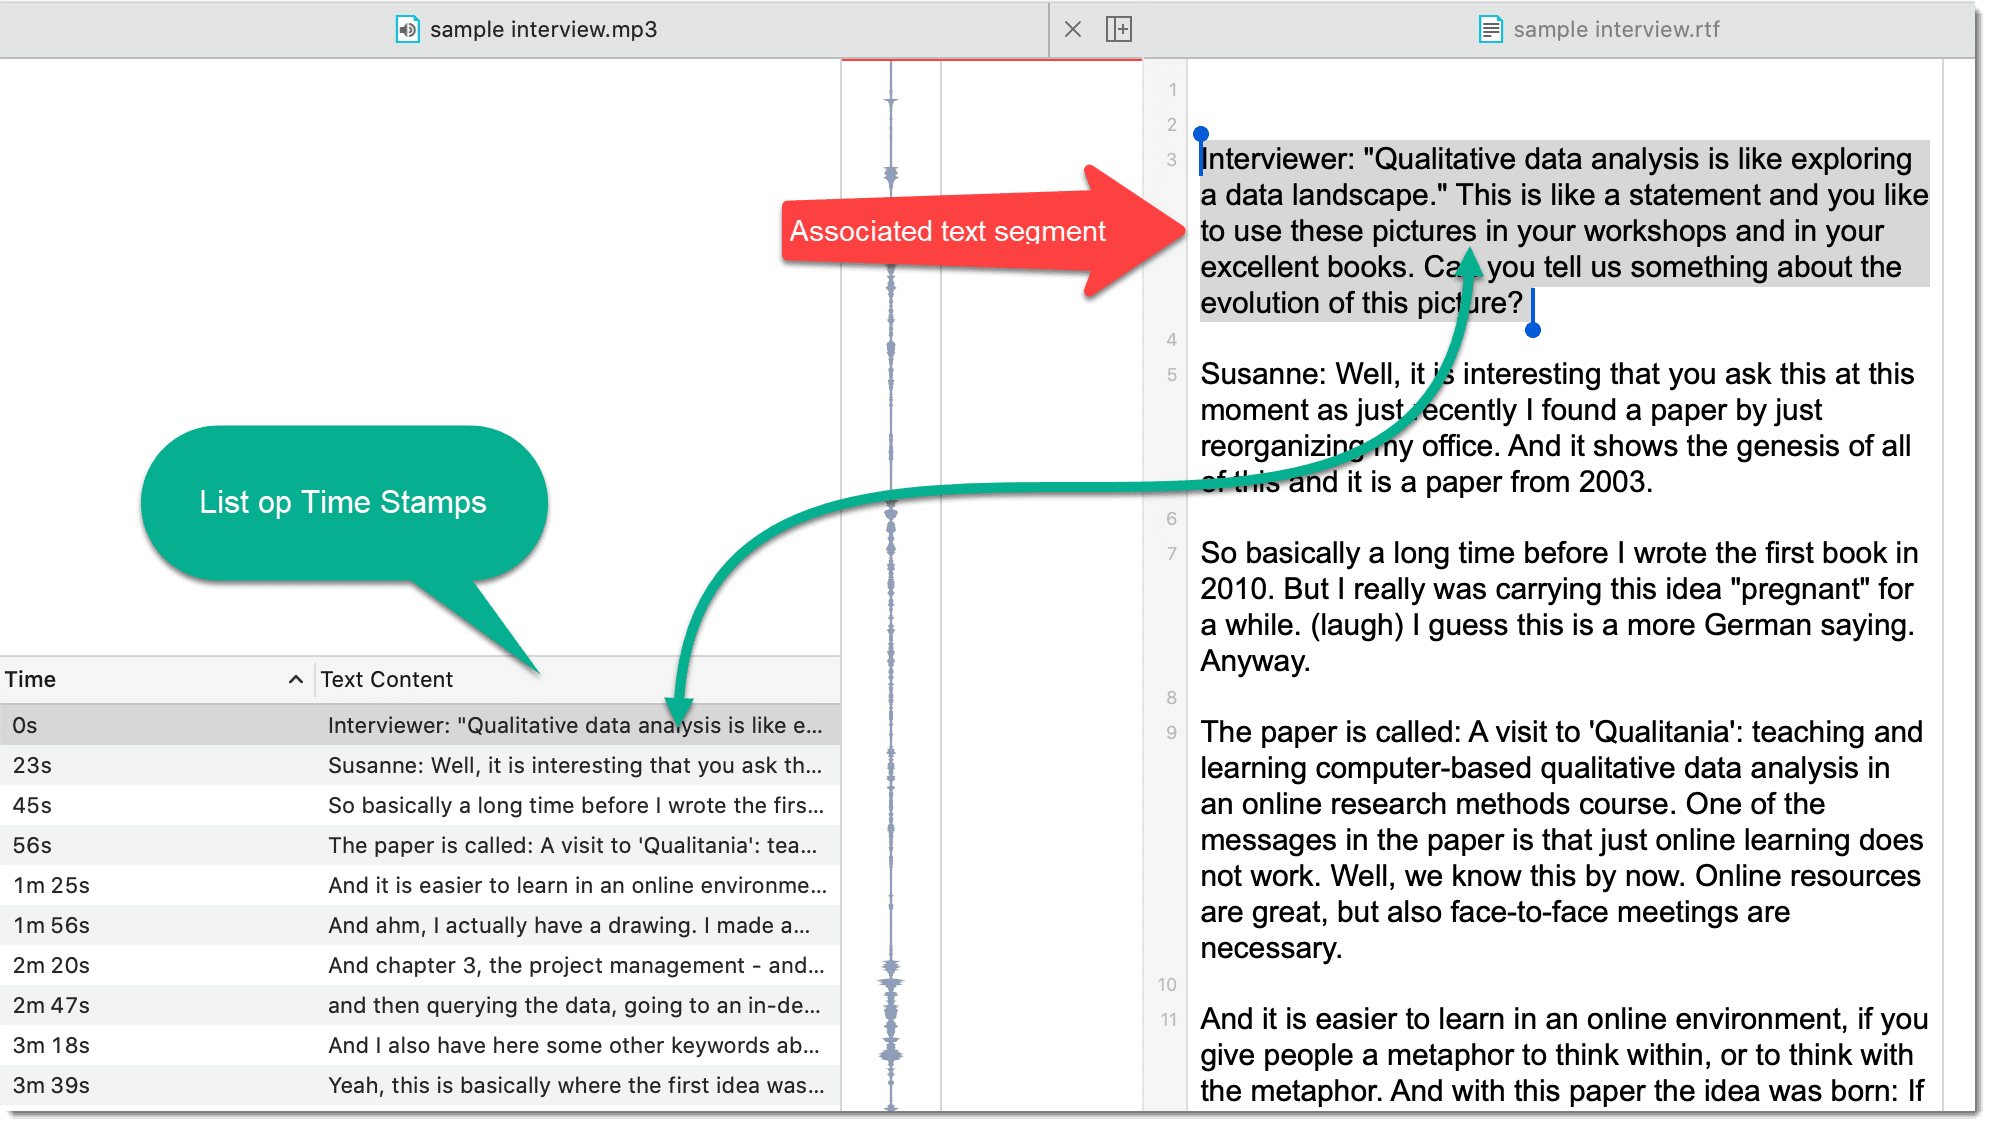
The transcript will be imported into the project and loaded next to the multimedia file. Below you see an audio recorded interview transcribed with f4 transcript.
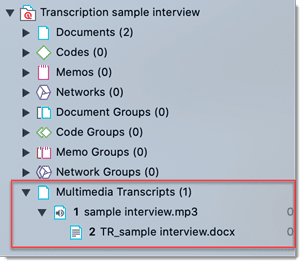
Further, you see a new entry in the Project Explorer under the Multimedia Transcripts branch.
It is possible to associated multiple transcripts with the same audio or video file, e.g. if you have different language versions.
Synchronized Scrolling
By default, synchronized scrolling is activated in the toolbar after importing a transcript. This means when you play the multimedia file, the text segment in the transcript between two timestamps is highlighted while the multimedia file is playing.

If the document does not contain timestamps, ATLAS.ti estimates the synchronization based on the length of the multimedia file and the transcript. You can add time stamps for a better synchronization. See below for further information on how this is done.
Display of Timestamps
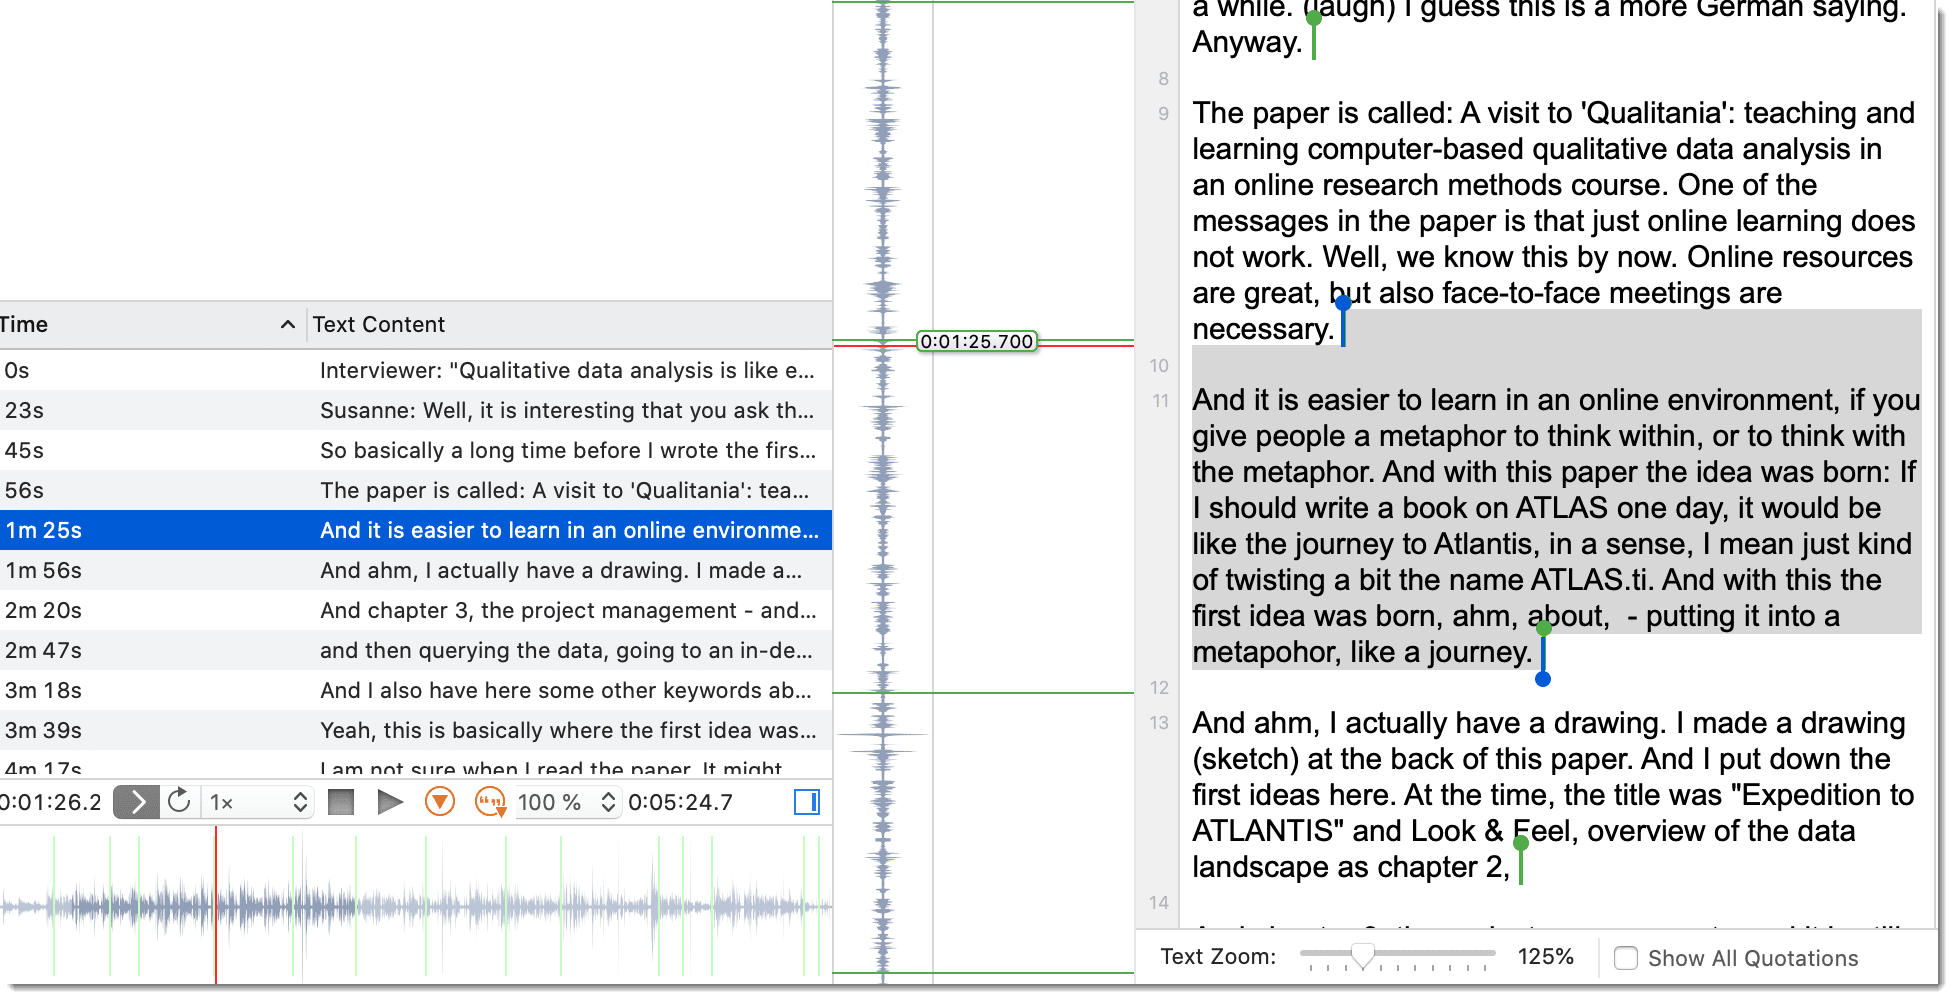
You see a list of time stamps in the audio or video document pane. If you want to see more or less, you can grab the header with your mouse and pull it up or down.
To see the timestamps, click on the Edit Timestamp button in the toolbar.
The timestamps are indicated by green markers.

- In the transcript, you see green markers indicating the start and end positions of the time stamps.
Editing Timestamps
You can either modify the position of an existing timestamp, add new ones, or delete timestamps.
Click on Edit Timestamps in the toolbar if not yet activated.
Adding a Timestamp
In the transcript, put the cursor at the position where you want to add the time stamp. In the multimedia document, position the play-head (red line) to the corresponding position. In the toolbar, click Add Timestamp.
Note you move the read play head by scrolling with the mouse or by using the error keys, but not by grabbing it with the mouse.
Moving Timestamps
To move the position of an existing timestamp, grab the timestamp shown as green line on the left-hand side of the multimedia document over the wave form with your mouse, and move it to a different position.
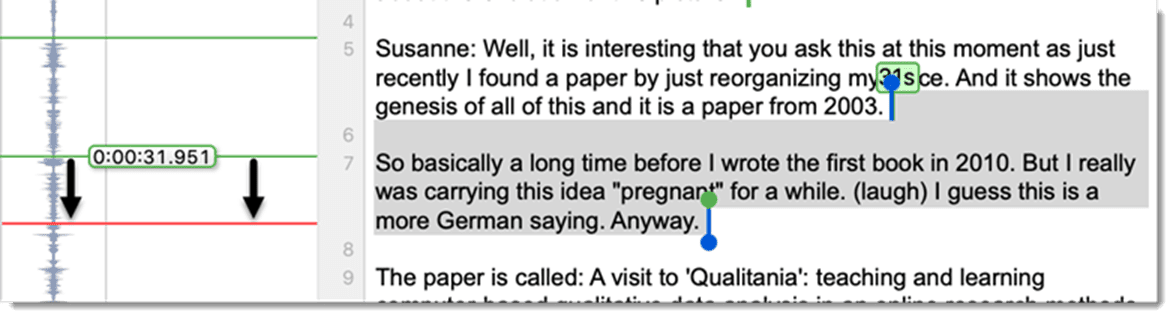
The above image shows the following example situation: When listening to the transcript in Synchronized Scrolling mode (see below), you may notice that the half sentence: "...and it is a paper from 2003" finishes in the audio file at the position of the red play head, thus below the timestamp. In order to correct this, you can simply move the green line to the position of the play head.
Deleting a Timestamp
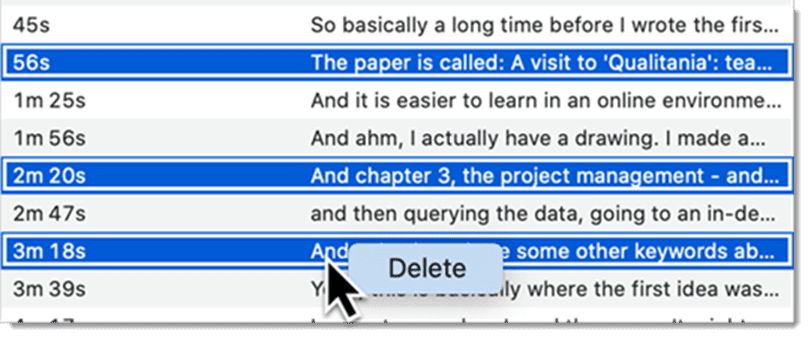
Select one or multiple timestamps in the timestamp list, right-click and select Delete.
Activating an Audio or Video Document with a Transcript
If you re-open a project, or otherwise all multimedia transcripts are closed, it is easy to open both documents side-by-side again:
Go to the Multimedia Transcripts branch in the Project Explorer and double-click on either the multimedia file or the transcript. Both the multimedia file and the transcript will be loaded.
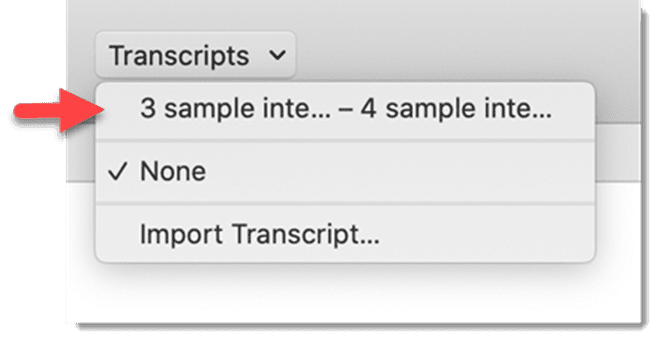
Another option is to load either the multimedia document, or the transcript from the Documents branch in the Project Explorer. Open the drop-down menu for Transcripts in the toolbar and select the associated file.
Deleting an Association
Open the Multimedia Transcripts branch in the Project Explorer, right-click on either transcript or the multimedia file, and select Delete.
This does not remove the document from the project. The multimedia file and transcript are still available in the Documents branch, but they are no longer associated.
If you want to remove an associated document from the project, you need to delete the association first.