
Preparing your Own Transcript
Video Tutorial: Importing automated transcripts
A multimedia transcript in ATLAS.ti consists of two documents: an audio or video file plus an associated transcript. The first step is to add the audio or video file to a project. Then you can associate one or multiple transcripts with the document.
Step 1 - Add a Audio or Video File
Add the audio or video file that you want to transcribe: Select Document > Add Documents; or select the link option: Document > Reference External Multimedia Document from the main menu.
For more information see: Add a multimedia file to your project.
Step 2 - Create a Word file
Create a new document in Word and save it under a meaningful name like "TR _Tim Miller_m_t_south_58"
(TR = transcript; Tim Miller = interviewee name or pseudonym; m = male; south = from region south; 58 = age 58).
Step 3 - Associate the Word File
Load the multimedia document, open the drop-down menu for Transcripts in the toolbar, and select Import Transcript. Select the Word document that you have prepared in step 2.
The transcript will be imported into the project and loaded next to the multimedia file, and you see a new entry in the Project Explorer under the Multimedia Transcripts branch.
Step 4 - Begin to transcribe
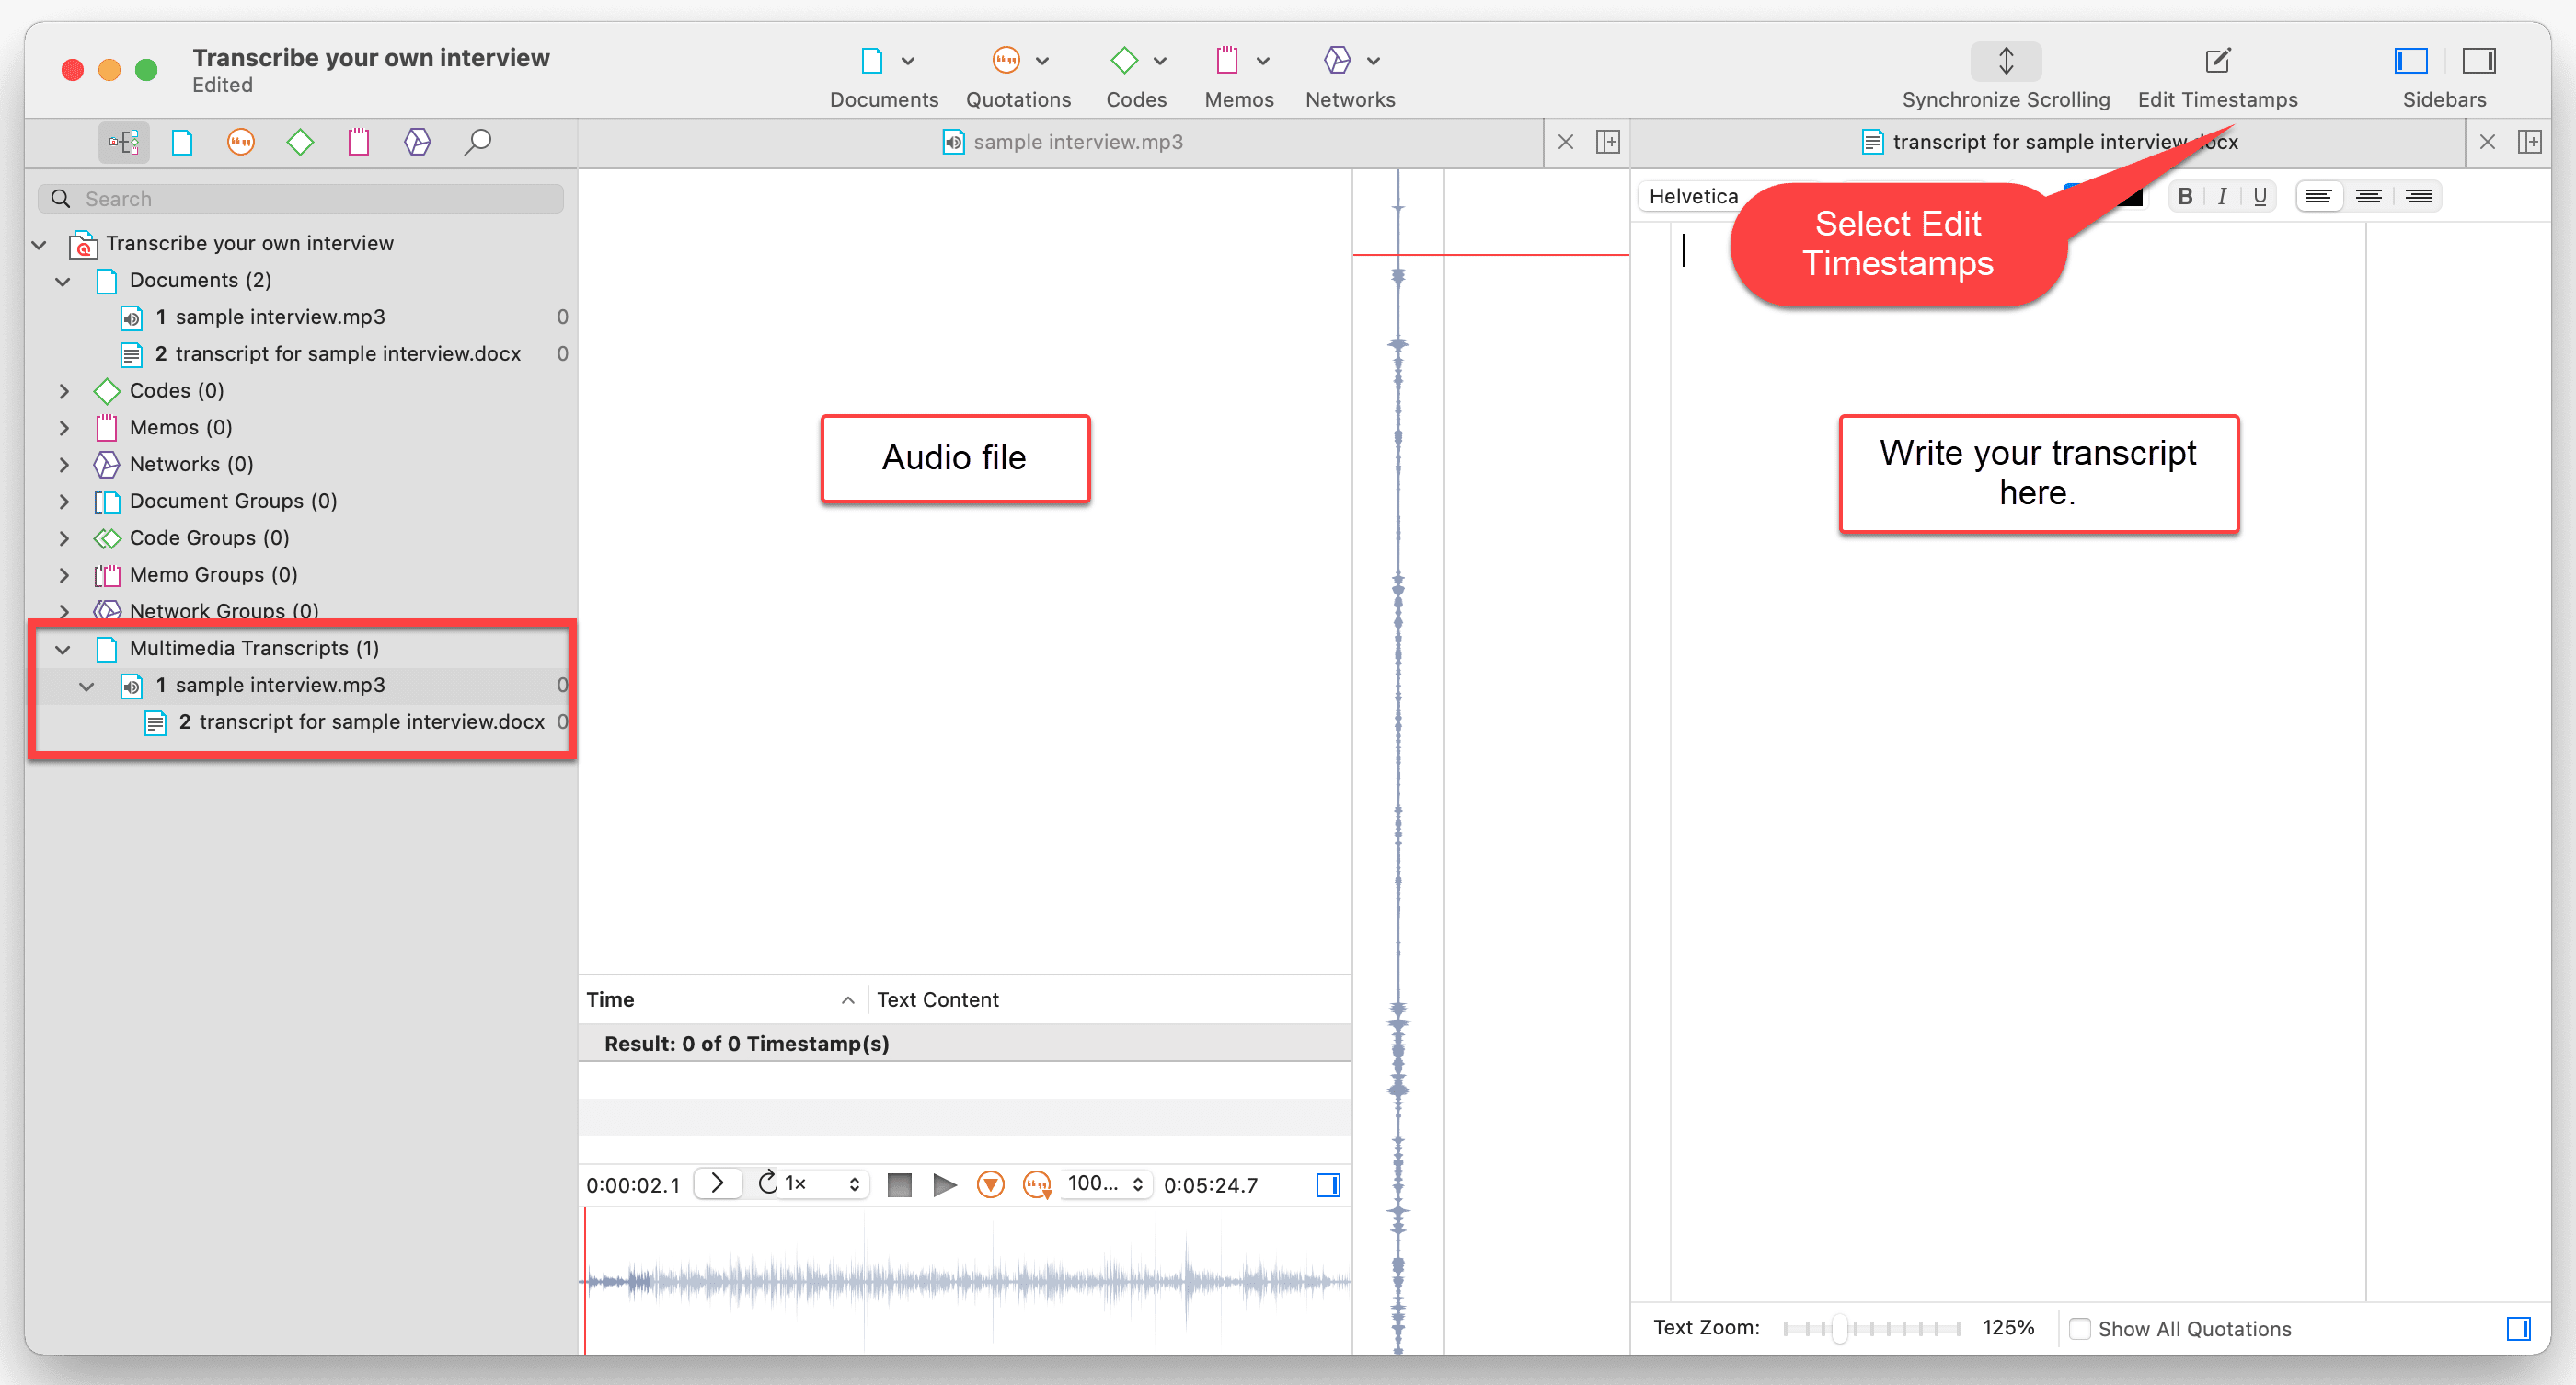
The text will is automatically be set to Edit Mode and synchronized scrolling is activated. The list of timestamps is still empty.
Activate the option Edit Timestamps.
Set a time stamp at the position where you want the transcript to start. This could be at the beginning of the recording. However, often the actual interview, or that what you want to transcribe begins later. Thus, the "point 0" is likely to be different for each transcript
Start to play the recording by clicking on the play button or by hitting the space bar and stop at the point where you want the transcript to start. Click on the Add Timestamp button. You see a first entry in the list for timestamps.

Click on Play again, or press the space bar. Listen to the recording, press the space bar again to stop. Type what you heard. Click on the Add Timestamp button. The timestamps in the text are displayed in form of green markers.
Reviewing the transcribed text
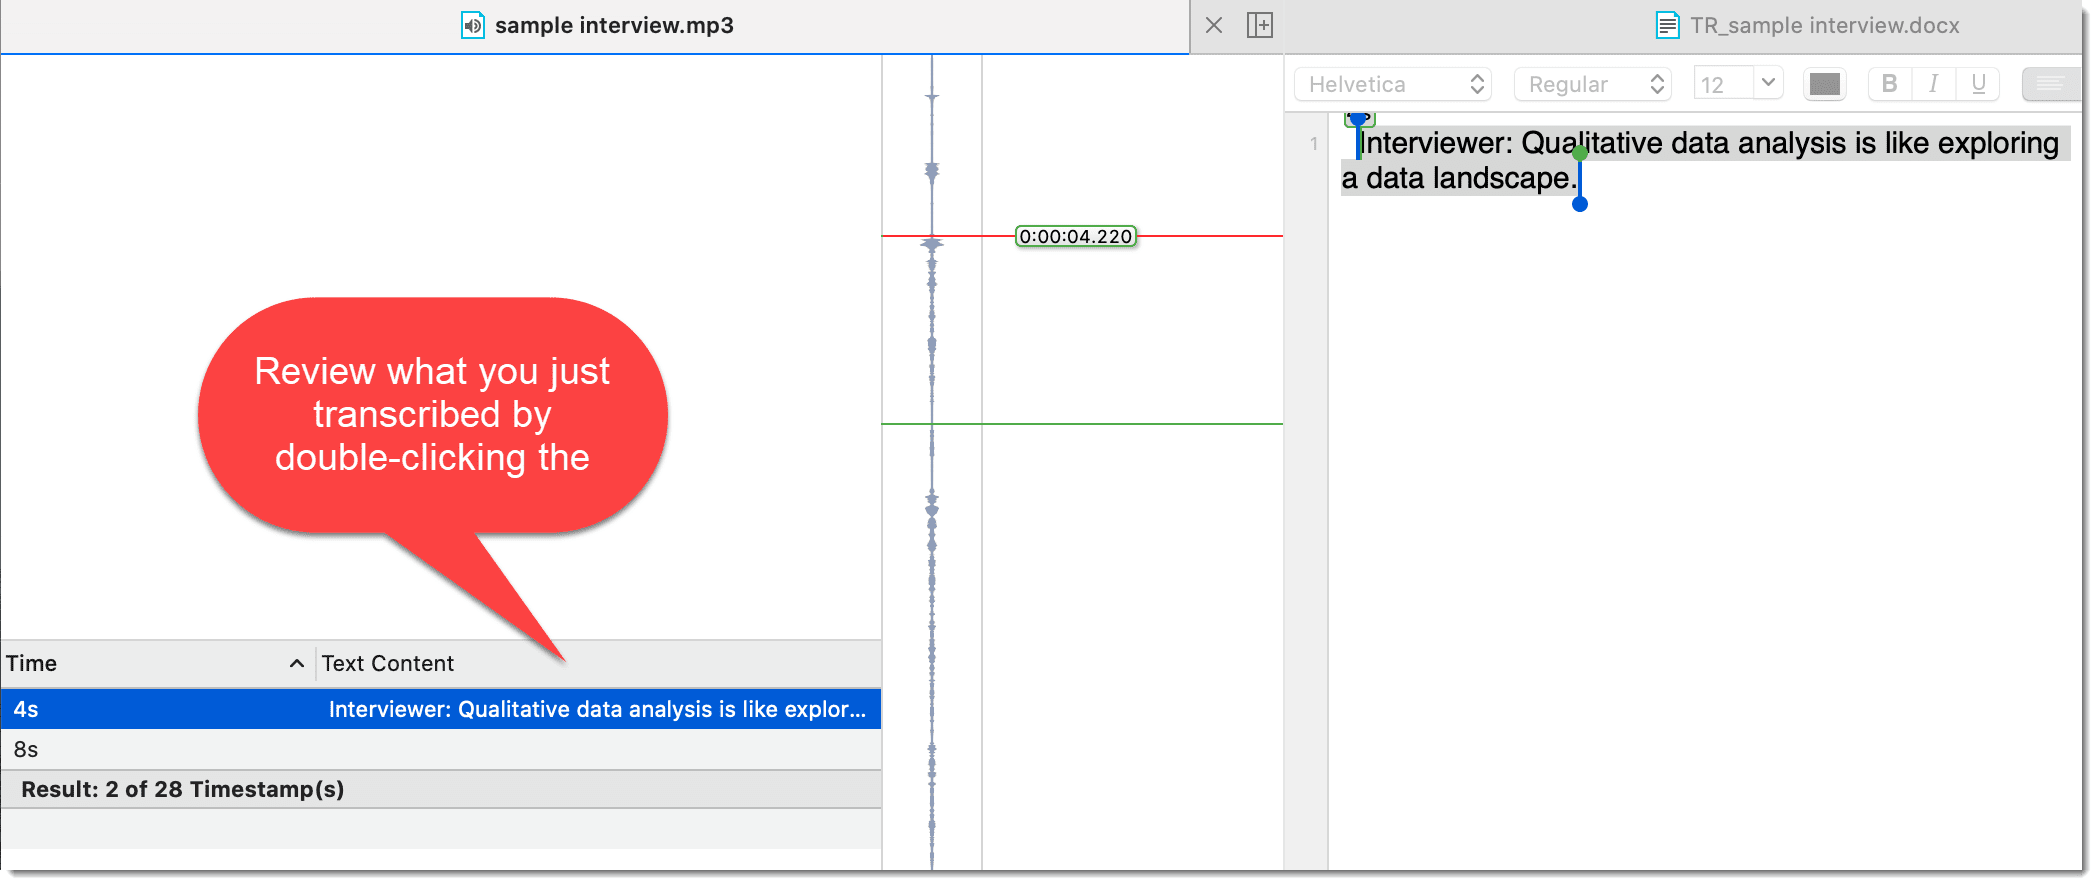
You can review what you transcribed by double-clicking the timestamp in the list.
Continue with your transcription:
Play the recording, press the space bar to stop. Type what you heard. Click on the Add Timestamp button. Review the transcribed section as necessary and repeat.
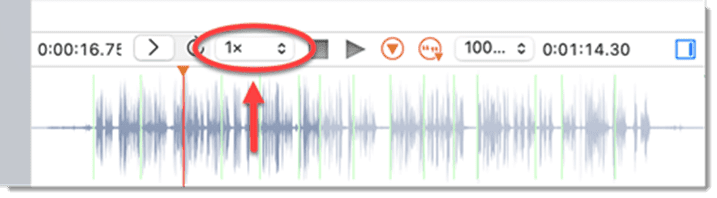
You can slow down or speed up the recording by clicking on the speed button as shown in the following screenshot:
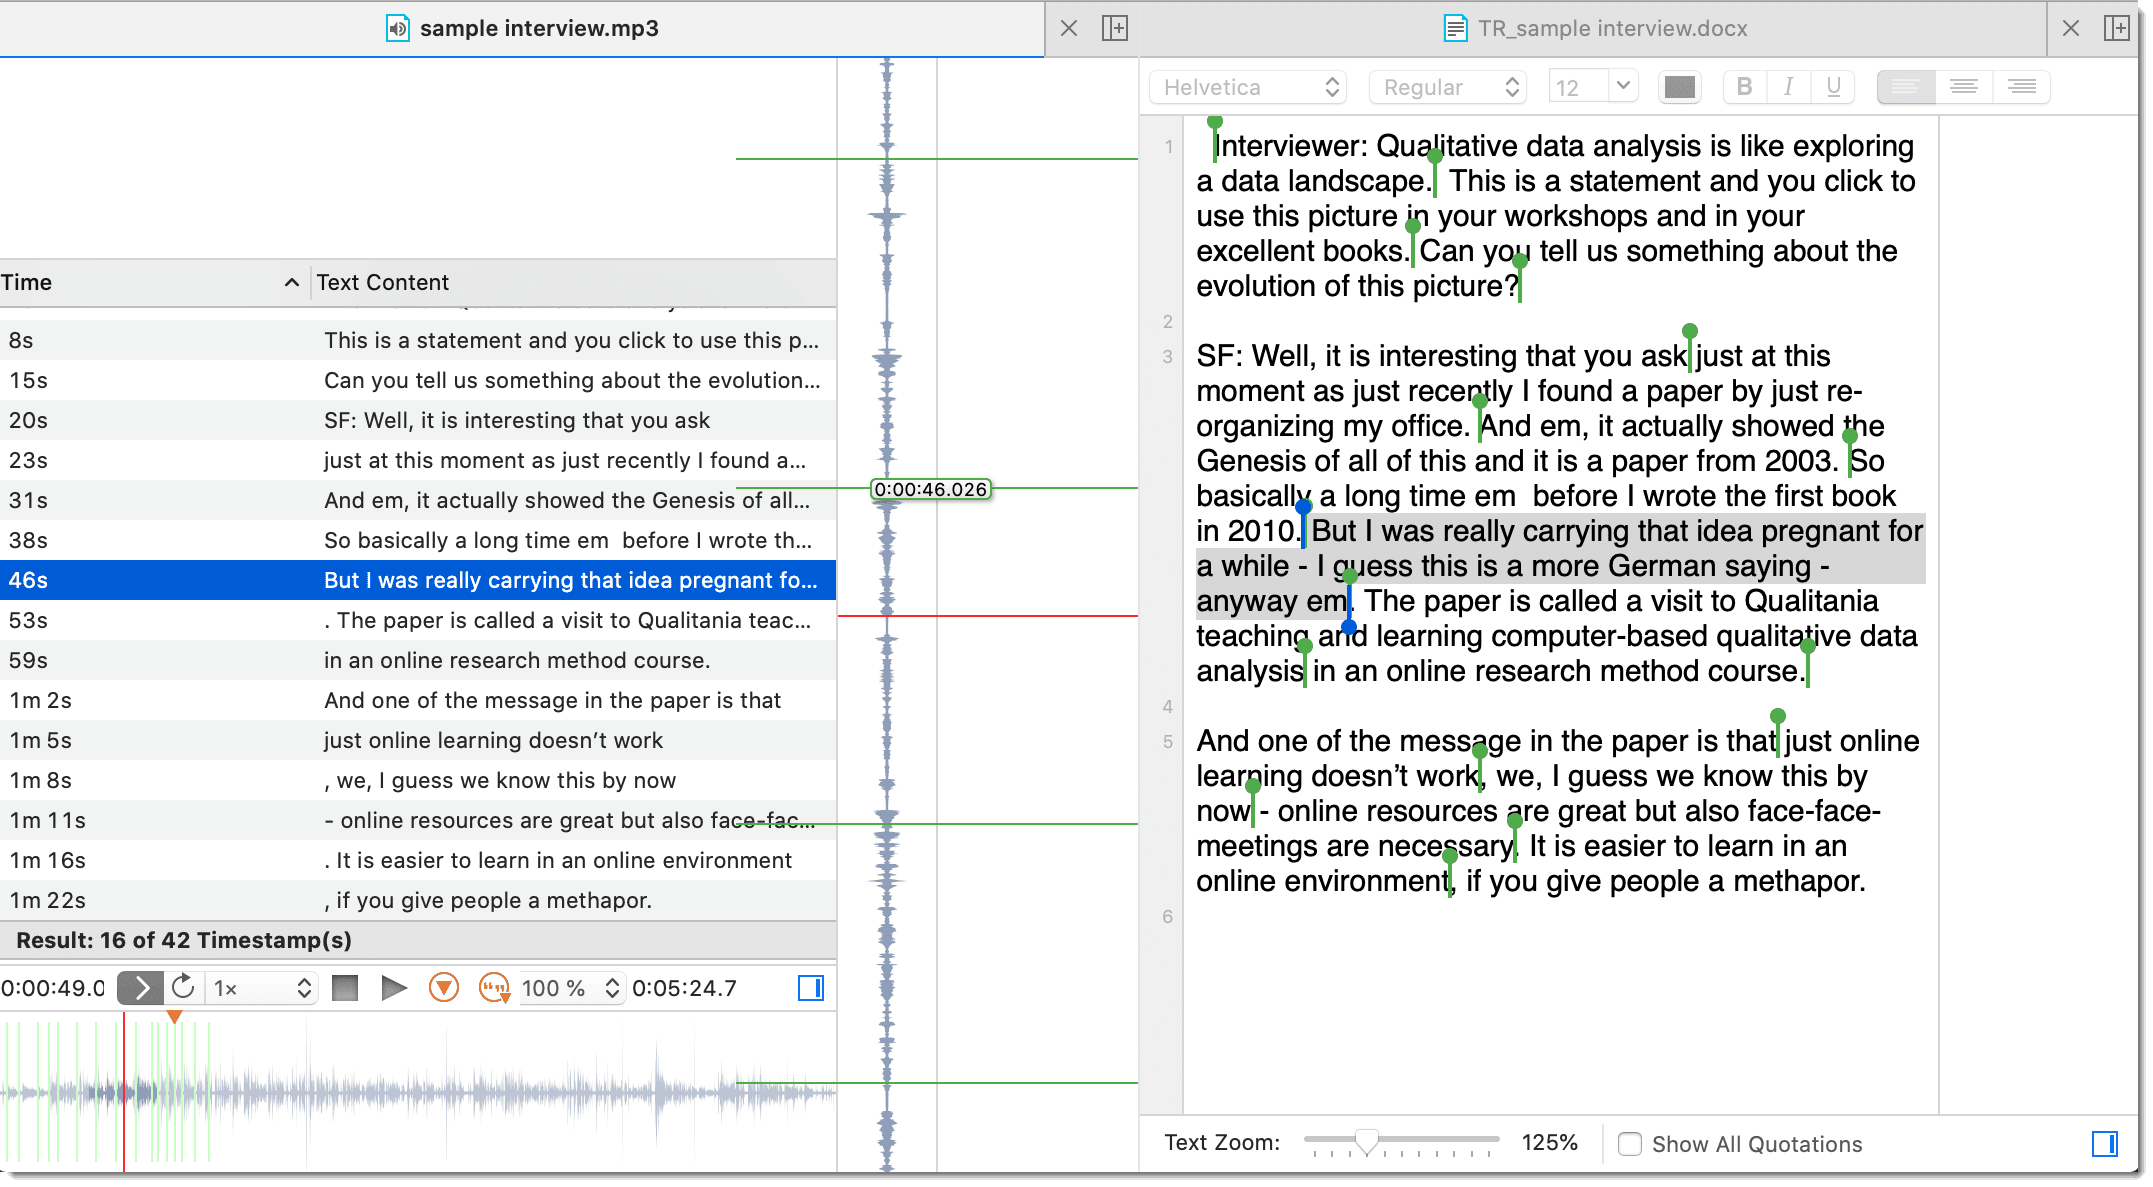
Below you see a screenshot of a transcription in progress:
For further information on how to work with timestamps and associations, see Working with Multimedia Transcripts.