
Importing Automated Transcripts in VTT and SRT format
Video Tutorial: Importing automated transcripts
A key shift that we have seen due to the COVID-19 pandemic is that researchers conduct their interviews via MS Teams or Zoom. Both create an automated transcript or caption of the recording, which can serve as a first version rough transcript. With ATLAS.ti you can import the transcript and associate it with the video recorded interview.
 The automated transcripts are provided in form of VTT or SRT files. This is standard also used by many other services. Thus, with ATLAS.ti’s native support for this format, you can now import transcripts from a great many services. Examples are:
- MS Teams
- Zoom
- YouTube
- Happyscribe
- Trint
- Descript
- Sonix
- Rev.com
- Panopto
- Transcribe by Wreally
- Temi
- Simon Says
- Vimeo
- Amberscript
- Otter.ai
- Vocalmatic
- eStream
All what you then need to do is to go through the text and make changes as necessary, and your transcript is done!
How to Generate Automated Transcripts - Useful Links
For most services, you will find instructions on how to generate and export transcripts on their websites. This is the best source of information as we are currently witnessing a rapid development in the area of automated transcription and procedures may change quickly. For your convenience, below we provide some links but invite you to also search yourself for updated information.
Zoom
Microsoft Teams
-
ATLAS ti importing transcripts from Teams or Zoom pt1: Downloading transcript and video by Steve Wright YouTube does not provide information directly on how to access the subtitles. If you search online, you will find a number of third-party tools that support the download of YouTube videos with subtitles.
How to Import Automated Transcripts
A multimedia transcript in ATLAS.ti consists of two documents: an audio or video file plus an associated transcript. The first step is to add the audio or video file to a project. Then you can link one or multiple transcripts with the document.
Step 1 - Add the Recording
To add the recording select Document > Add Documents; or select the link option: Document > Reference External Multimedia Document from the main menu.
For more information see: Add a multimedia file to your project.
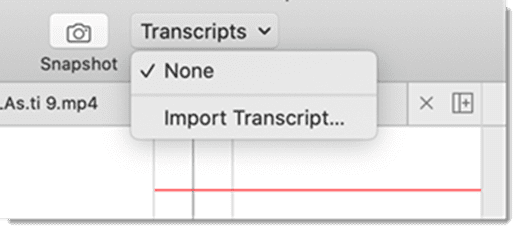
Step 2 - Associate a Transcript
Load the recording, open the drop-down menu for Transcripts in the toolbar, and select Import Transcript.
inst
Select the VVT or SRT file and click Open.
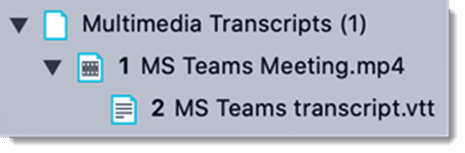
The transcript will be imported into the project and loaded next to the video recording. In the Project Explorer under the Multimedia Transcripts branch, you will find an entry for the video document and the associated transcript.
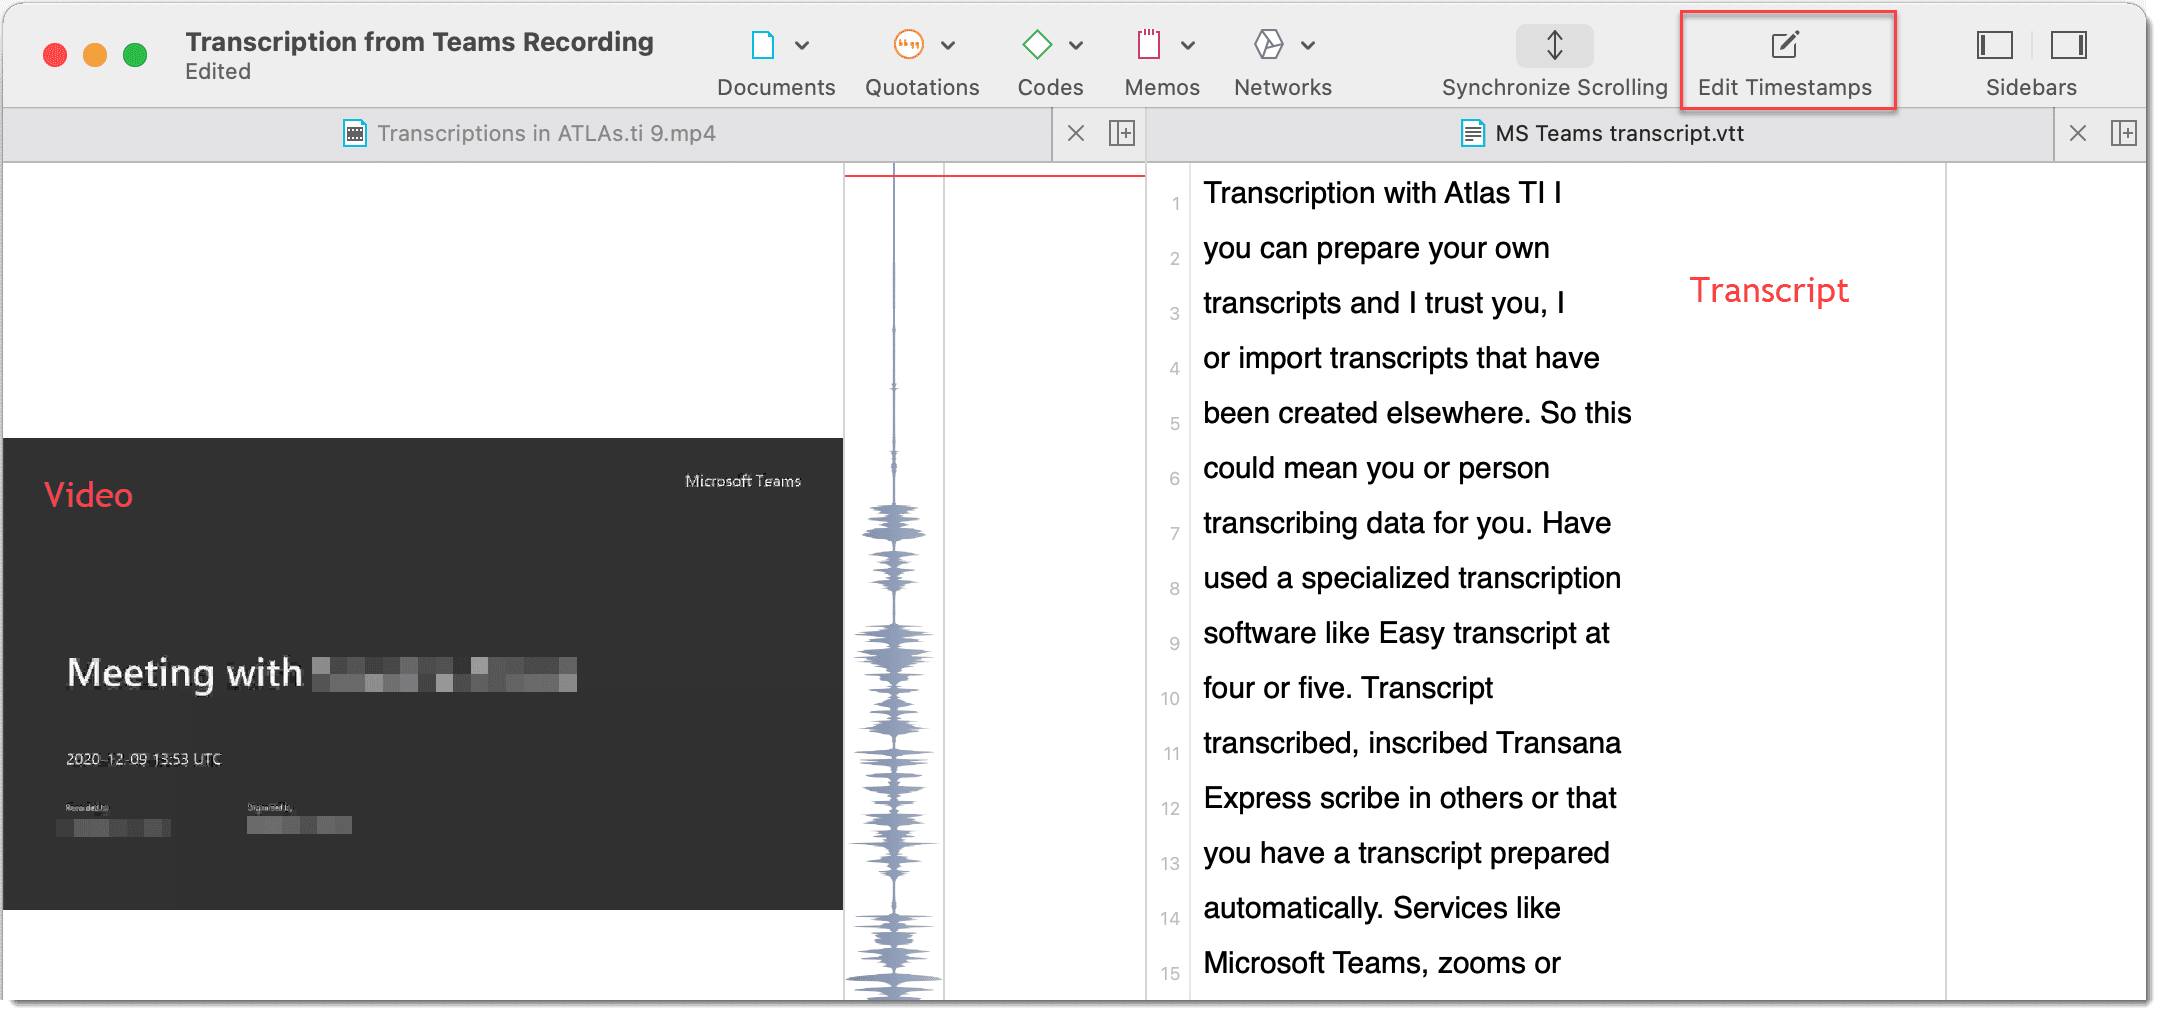
 Below you see a recording of a Teams meeting and its transcript.

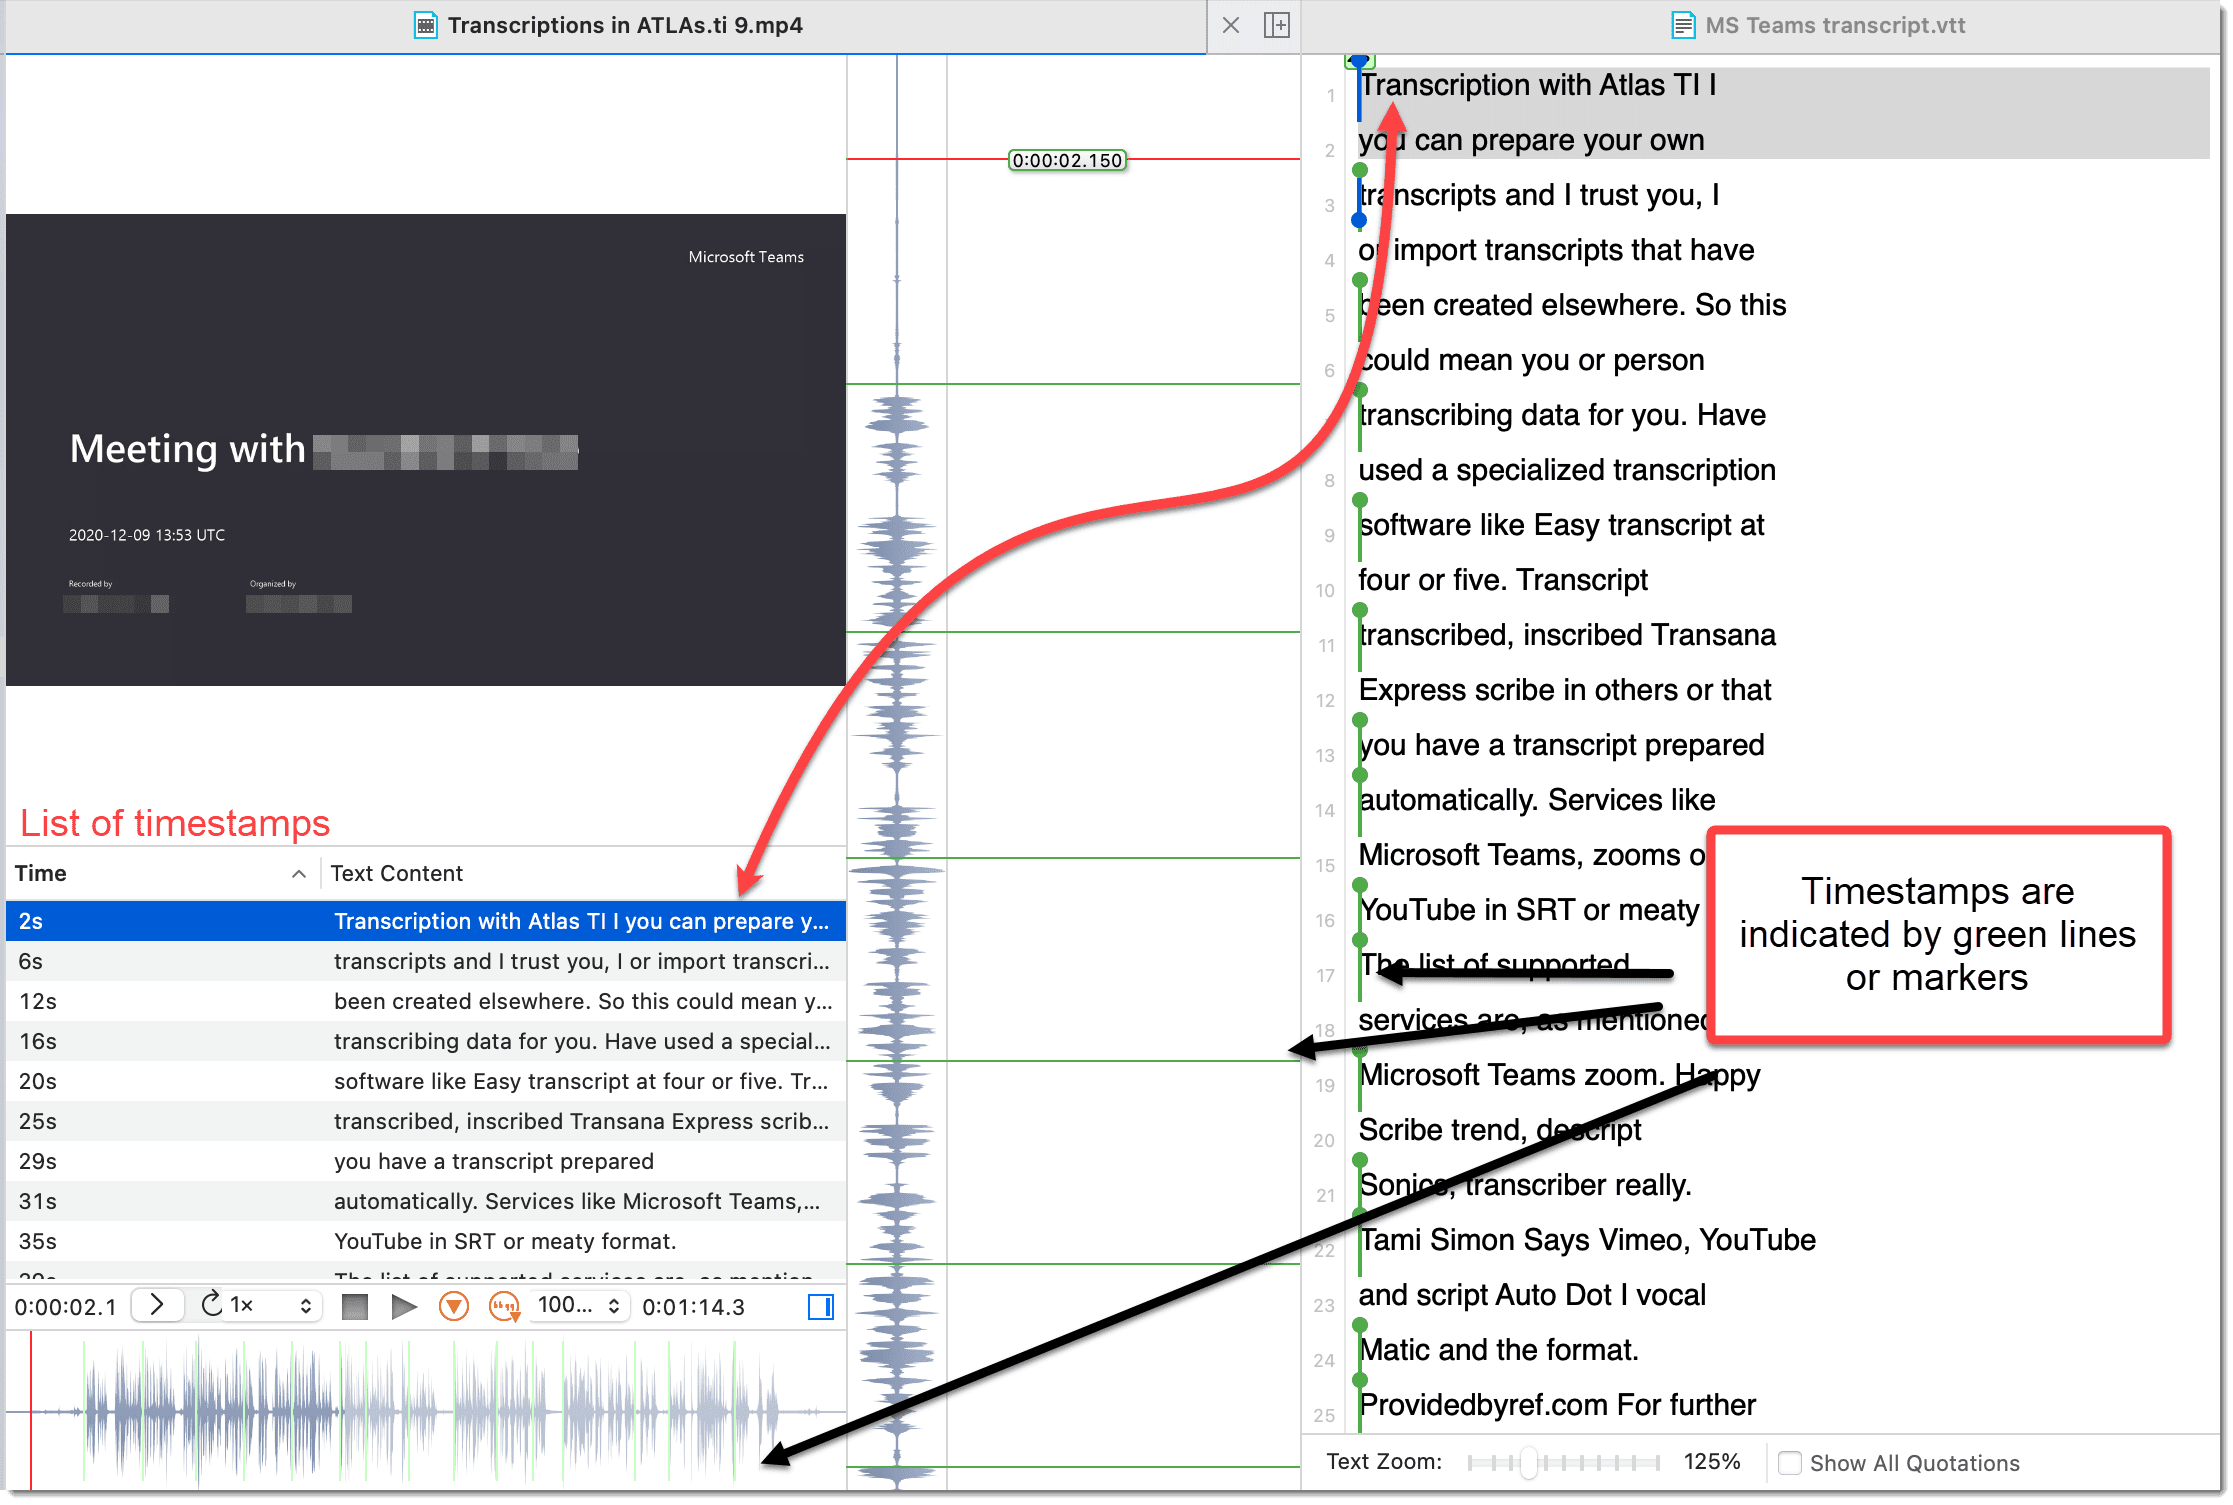
To see all timestamps, click on Edit Timestamps in the toolbar.
inst
If you click on a timestamp the associated text segment will be highlighted.
The transcription will not be perfect, however it serves as a good starting point. Editing the transcript will take less time than starting from scratch. Furthermore, reading and correcting the transcript allows you to familiarize yourself with the data.
When you edit the transcript, you can correct the text, move, add or delete timestamps.
For further information on how to work with timestamps and associations, see Working with Multimedia Transcripts.