
Creating Categories and Subcodes
Video Tutorial: Building a code hierarchy. If you want to sort your codes into higher and lower order codes, you can make use of categories and subcodes. An additional way to organize your codes are folders. Folders can contain other folders. This gives you multiple levels of organizing your codes. Only independent codes and subcodes can contain coded data. The reason for this is methodical rather than technical. If you use a deeper hierarchy, you will likely start duplicating and even multiplying codes at the lower levels. Not only does this make your code system long and difficult to maintain, it also prevents you from performing effective comparative analysis. Below we quote just one of the many authors who offer this advice:
"If you have a typical project of moderate complexity, it should require no more than 10 top-level [parent] categories" to cover the topic [...]. Furthermore, most code systems do not go more than two or three levels deep. If they do, it is likely that the categories being used are no longer true subcategories of the higher-order categories they are under; and, on a practical level, it becomes inconvenient for the coder to remember, locate, and effectively use them" (Bazeley, 2013. p. 183).
See also: How to build a code system.
An additional way to organize your codes are folders. You can add independent codes and categories with their subcodes to folders. Folders can also contain other folders. This allows you to group codes under themes or topics that are too abstract anyway to be used for coding.
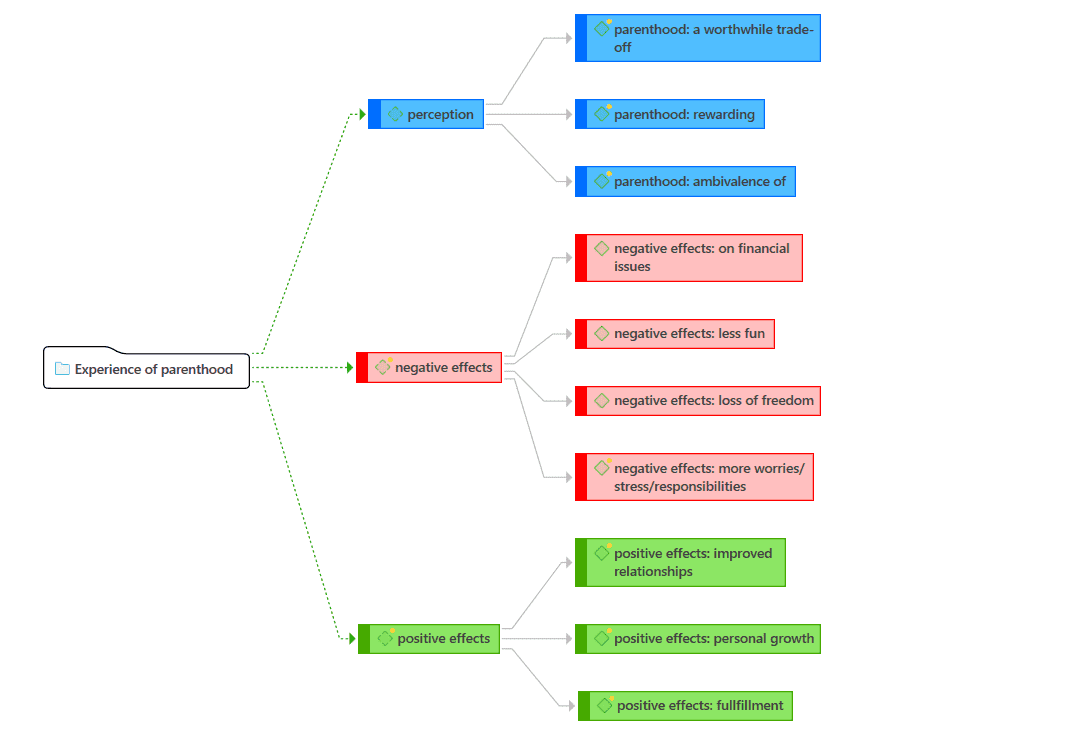
Below is an example showing a 3 level hierarchy, illustrated using the ATLAS.ti network function:
Creating Categories with Subcodes
There are two ways to create a category: by moving codes via drag & drop under a free code, or by splitting a code that already has codings.
Moving Codes under a Free Code
Create a new code.
Select one or more codes in the code list using the common selection techniques for multi selections.
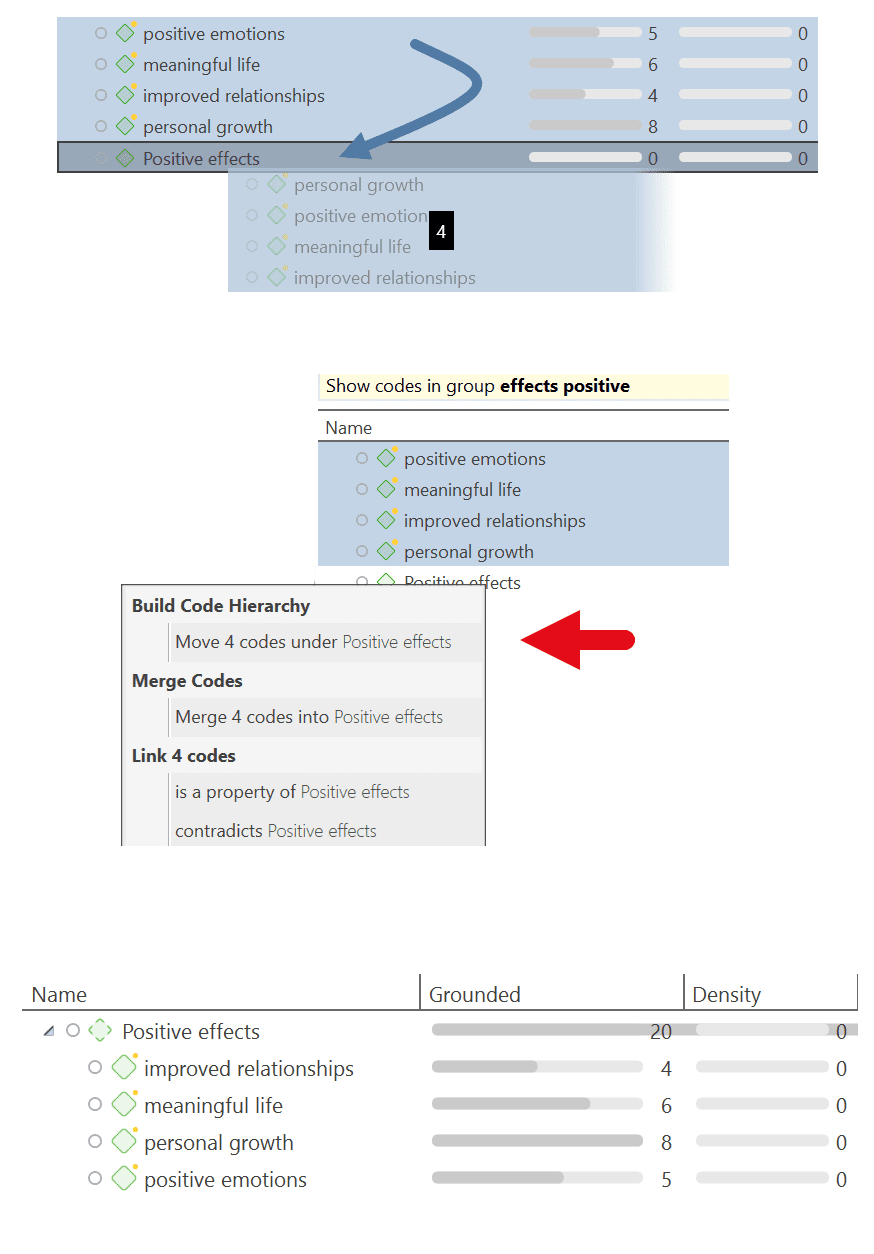
Drag the codes to the newly created code. A context menu opens. Select the first option: Build Code Hierarchy:
Once you have added subcodes to an independent code, it becomes a category. The code icon changes. See image below.
Creating a Category via Splitting
Select a code that you want to split into subcodes.
Right-click and select the option Split into Subcodes, or click on the dropdown next to Split in the ribbon and select Split into Subcodes from there. The Split Code tool opens.
Click on Add Codes to enter the labels for the subcodes. After entering the first code, press the down arrow to move to the next entry field to enter the second label, and so on. Once you are done, click on Add.
By default, a subcode with the name Undecided is added to the first column of the table. All quotations are added to this subcode. The next step is to assign the quotations to the new subcodes you have created. If a quotation does not fit into any of these subcodes, you can just leave it in the subcode 'Undecided'.
This is how you assign the quotations to one or more subcodes:
Select a quotation. Its content is shown at the bottom of the screen. Assign the quotation by clicking on the checkbox of the subcodes that apply.
To speed up the process, you can press the number keys (1,2,3, usw.) to assign the selected quotation to subcode 1, 2, 3, usw.
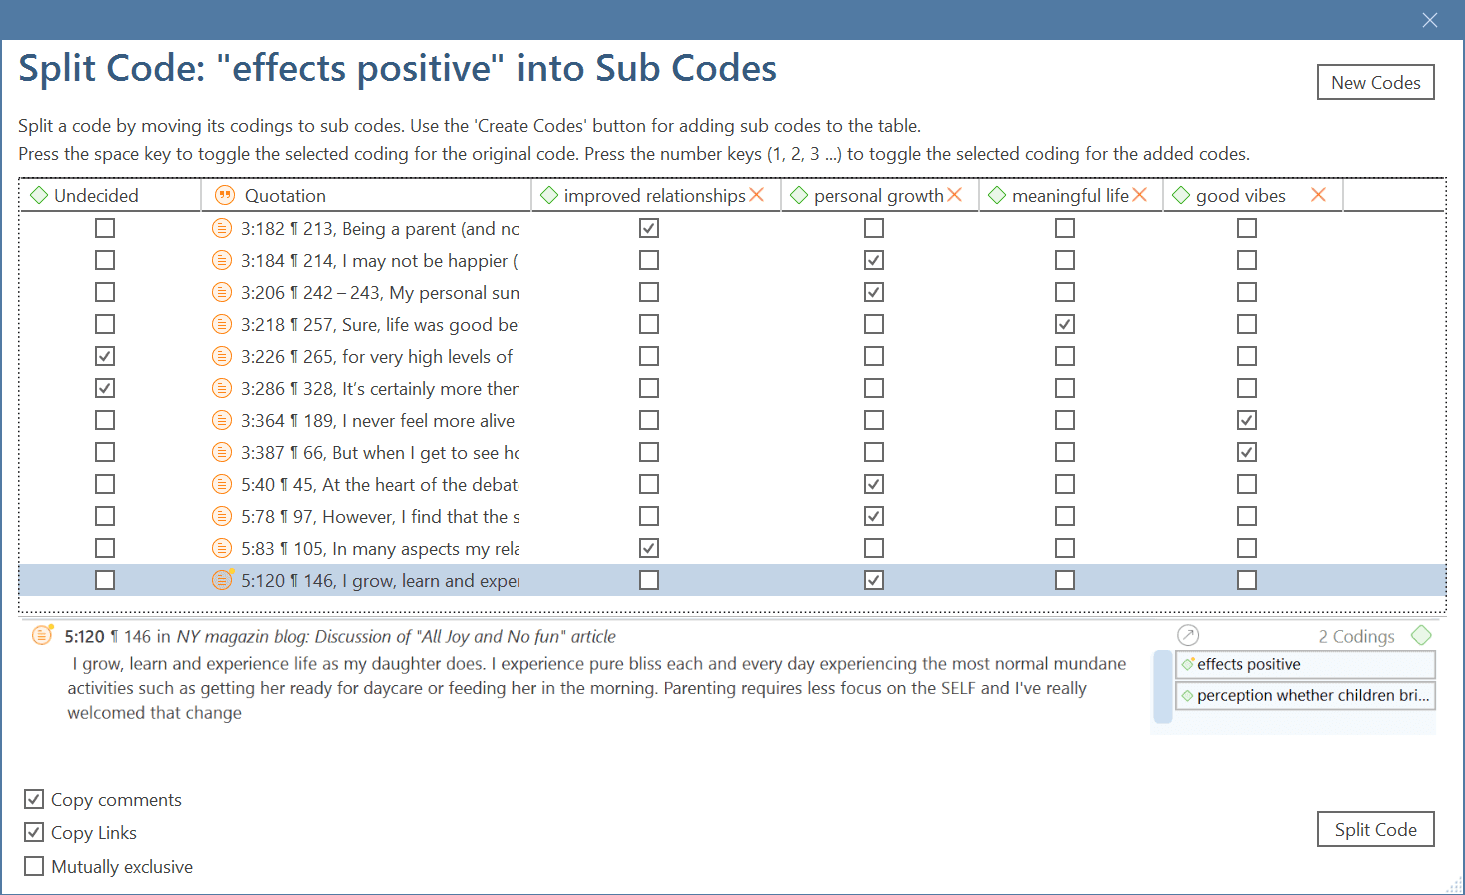
Mutually exclusive: If you do not want to allow that a quotation is coded with two of the subcodes, activate the option Mutually Exclusive. This is a requirement for some content analysis approaches and for calculating inter-coder agreement. See Requirements for Coding.
Once all quotations have been assigned to one or more subcodes, click on Split Code. The code that you split will be turned into a category. This is indicated by the changed code icon. If you click on the drop-down arrow in front of the code, you can expand the category to see the subcodes.
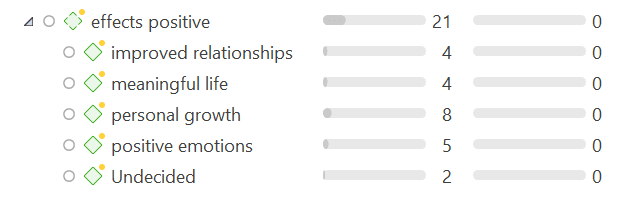
The groundedness of a category code is the number of quotations coded by all of its subcodes. Since you can apply several codes to the same quotation, the total for a category can differ from simply adding up quotations for all subcodes. Both sums are only equal, if you use subcodes in a mutual exclusive manner.
Creating category and subcodes in the coding dialog
When double-clicking on a quotation in the margin, or when highlighting a data segment and selecting the Apply Codes option from the context menu, the coding dialog opens. You can create a new category with a subcode directly here in the dialog, or add a new subcode to an existing category.
Adding a category with subcode
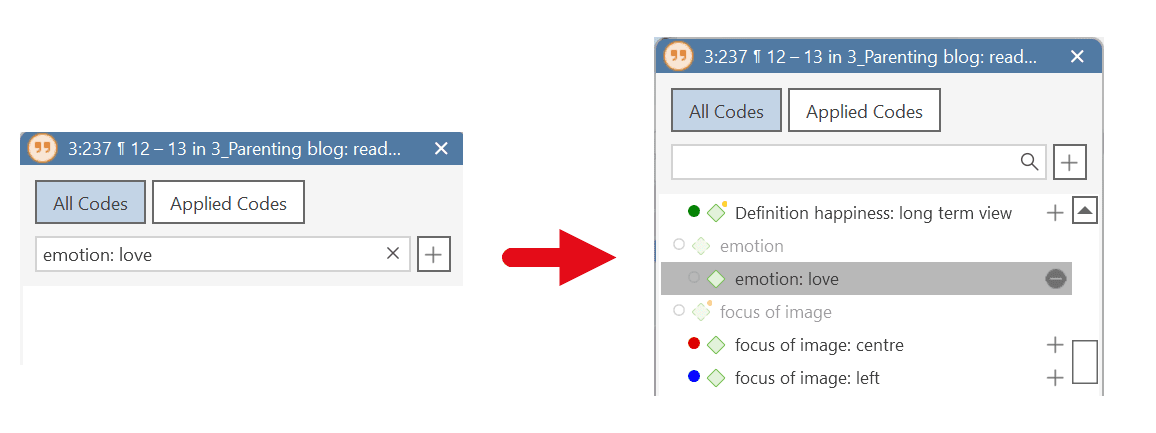
In order to create a category code with a subcode, you simply have to enter as label: category name: subcode name:
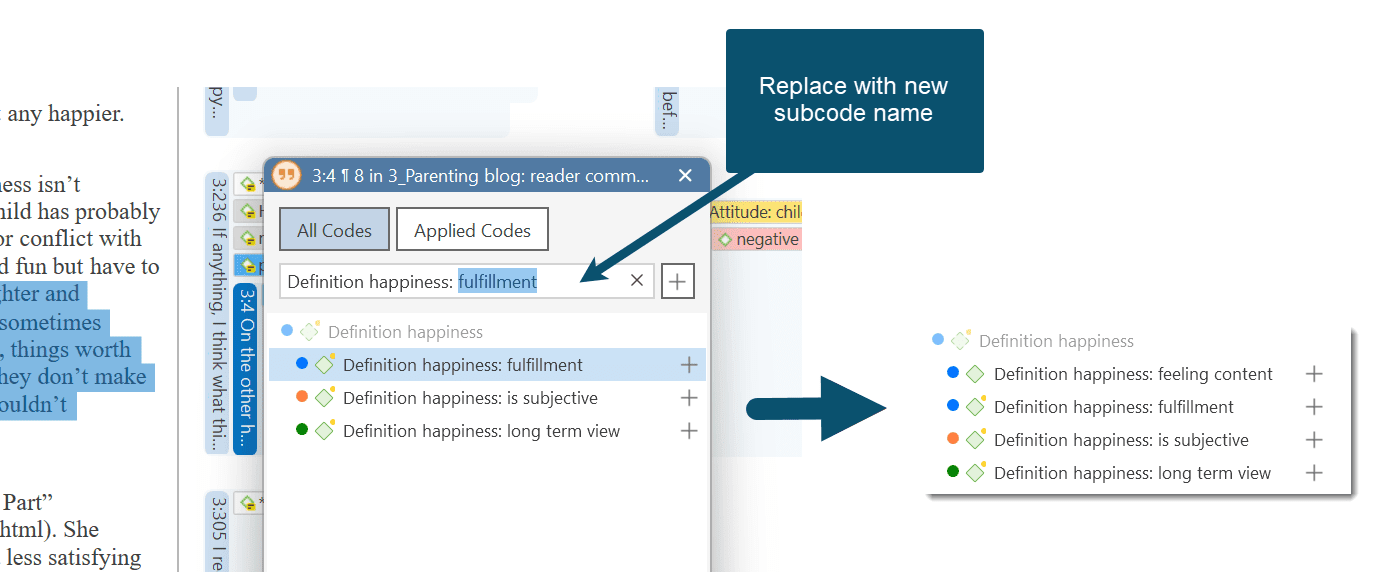
Adding a new subcode to an already existing category
Start typing the name of the category code. This filters the code list.
Select one of the existing sub codes, highlight the subcode name and type over the new name, or delete that part of the name first and then add the new subcode name.
Easy coding with subcodes of a category
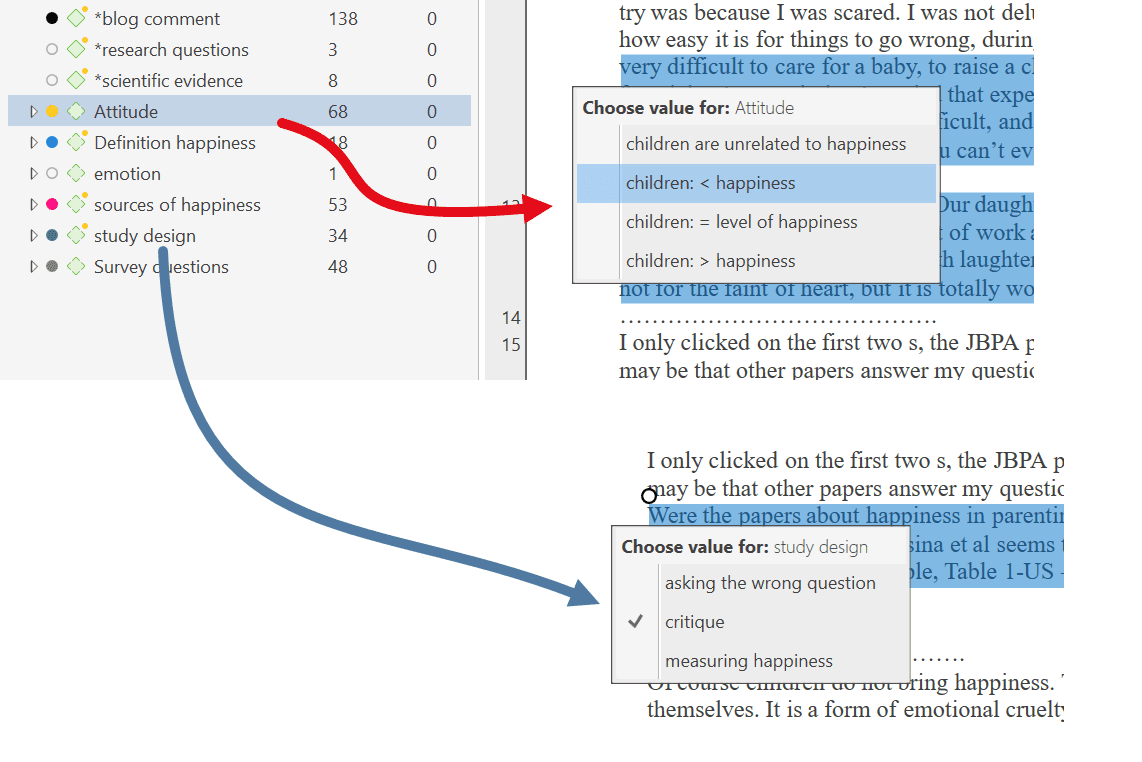
There is a very easy way to apply subcodes to your data via drag & drop coding.
Highlight a section of your data and drag & drop a category code from other the project explorer, code browser or code manager onto the text.
A window pops up showing you the list of subcodes. Select one of the subcodes to code.
If you select an existing quotation and one or more subcodes of the selected category have already been applied, this is indicated by a check mark.
How to move subcodes out of a category
You have two options, you can move subcodes from one category to another category via drag & drop.
If you want to move subcodes out of a category to the first level, they become independent codes again. If you move all subcodes, the category code also becomes an independent code again.
Highlight the subcodes you want to move and drag them to the left side until you see a black vertical line, then drop:
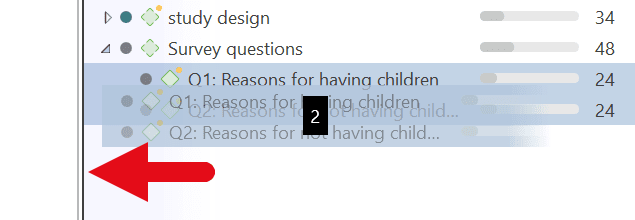
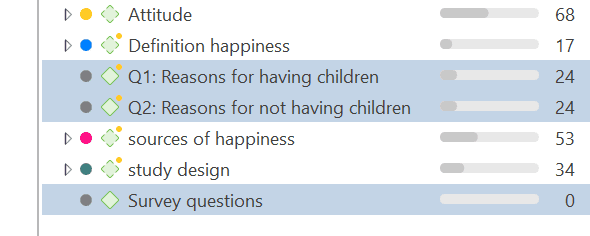
The subcodes will be sorted into your code list in alphabetic order. The groundedness of the category wil be adjusted. In the example illustrated below, all subcodes were moved out of the category; the category has become an independent code with groundedness 0:
Organizing Codes in Folders
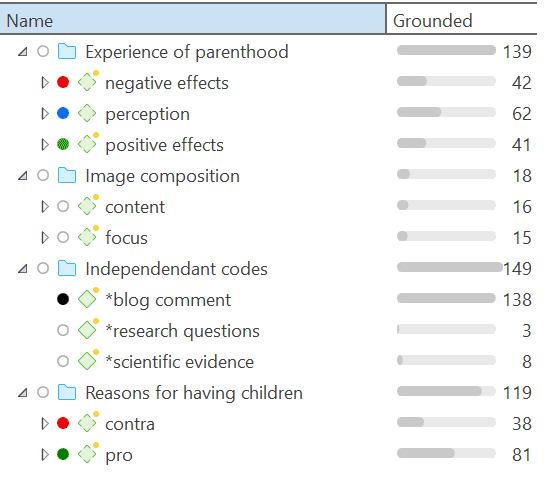
Independent codes or categories with their subcodes can be organized into folders. In contrast to code groups, a code or a category cannot be in more than one folder. The folder structure is hierarchical, code groups are not.
Folders can be contained in other folders. There might be projects that require a fourth level of organization. Below you find an example with three levels. See also the recommendations in the chapter How to build an effective code system.
How to create folders
In the Code Manager ribbon, click on the New Folder icon.
Or:
Select one or more codes or categories, right-click and select the option New Folder with Selection from the context menu.

If you delete a folder, all content in the folder is also deleted.
How to move items between folders or out of a folder
You have two options: You can move independent codes, categories, or subcodes from one folder to another folder via drag & drop. The second option is to highlight all items that you want to move, and drag them to the left side until you see a black vertical line; then drop.