
Multimedia Data (Audio & Video)
When we refer to multimedia data, we mean audio and video files. The difference in terms of displaying auto or video files is that there is no picture when working with audio files; the mouse clicks in handling audio files are the same. Therefore, below we describe all steps for both file formats together. For illustration purposes, most figures show video data.
Adding Multimedia Documents to a Project
As multimedia files, especially video files can be quite sizable, it is recommended to link multimedia files to a project rather than to import them.
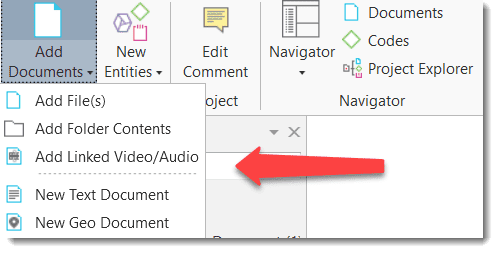
To link audio or video files to a project, in the Home tab click on the dropdown arrow of the Add Documents button and select Add Linked Video/Audio.
Linked documents remain at their original location and ATLAS.ti accesses them from there. Preferably, these files should not be moved to a different location. If the files need to be moved, you need to re-link the files to your project. ATLAS.ti will alert you, if there is an issue, and a file can no longer be accessed. You find a Repair Link option in the Document Manager under the Tools Tab.
Display of Multimedia Documents

Audio wave: On the right-hand side the audio wave is displayed. You can make is smaller or wider by positioning your mouse on the left-hand side of the audio wave and dragging it either to the right-hand side or the left-hand side.
Preview images: For video files, preview images are displayed in the document preview and the margin area. When you add a new video to a project, you do not immediately see the preview images as they first need to be generated. Depending on the length of the video this may take a few seconds or up to a few minutes.
Preview images are generated from key frames. A key frame is defined as one of the frames in a video, which provides the best summary of the video content. The key frame rate is a variable that you can set in most encoding software when creating the video file. A fast key frame rate (with a lower number on the scale, as this refers to the interval between key frames) means that the video has more frames designated as key frames. A slower key frame rate means that fewer frames are designated as key frames.
If you've got a typical talking head video or something else with little motion, you can get away with a slow key frame rate. If you are shooting something with a lot of motion like a sporting event or a dance recital, a faster key frame rate is necessary. The standard rate is to include a key frame every 5 seconds.
Playhead: The playhead shows the current position in the video or audio file.
Document preview: Below the display area you see a preview of the entire document. You can use it to select the area that should be displayed in the margin area.
Zoom: In most cases, the space from top to bottom of your computer screen will be too small to meaningfully display your audio or video file, you can zoom the file. This is done in the full document preview section. For this you use the two orange lines that you see to the right and left of the full preview. See Zooming the Timeline.
Media Controls
If you move the cursor inside the audio or video pane, the media controls appear, and you can start, stop and pause the video, skip forward and backwards. You can also start and stop the multimedia file by pressing the space bar.

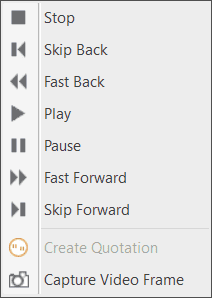
From left to right:
Stop: Stops the multimedia file and set the play head to the beginning.
Skip to previous mark: Moves backward to the last mark, which could be the end or beginning of a selection or a section, or the beginning of the file.
Skip backward: Seek backward in the multimedia file.
Play / Pause
Skip to previous mark: Moves forward to the next mark, which could be the end or beginning of a selection or a section, or the end of the file.
Skip forward: Seek forward in the multimedia file.
Volume: On or Off
Click the space bar to stop and start an audio or video file.
Multimedia Toolbar
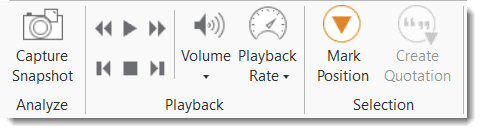
As soon as an audio or video file is loaded, the multimedia options will be displayed in the Document tab. If you hoover over each button with the mouse, a screen tip is displayed explaining each option.
Capture Snapshot: If you want to analyze a particular frame in more detail, you can take a snapshot. If you click on the snapshot option, the frame will be added as a new image document to your project.
Media Controls: See above.
Volume: Set the volume on slider between 0% (mute) and 100%
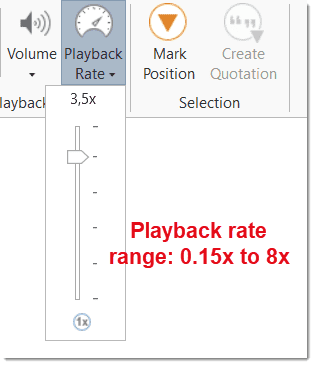
Playback Rate: If you want the video to play faster or slower, you can select a playback rate between 0,15 times the original speed to 8 times the original speed. The current play back rate is shown in the blue status bar at the bottom of the screen.
Mark Position: Sets the start position for a quotation. See Working with Multimedia Files.
Create Quotation: Sets the end position for a quotation and creates a quotation at the same time. See Working with Multimedia Files.
You can also access the media controls with by right-clicking on the audio or video area.