
Welcome Screen
When you open ATLAS.ti, you see the Welcome Screen. It is divided into three parts:
Welcome Screen (left-hand side)
On the left-hand side, you find licence information, you can create a new project or import an existing project, and you can access Options.

Welcome Screen (middle section)
In the middle section you can see and access all of your projects. If you have lots of projects, the search field will help you to locate a project.
You can sort projects by name, created, last modified, and last used.
Context menu for projects
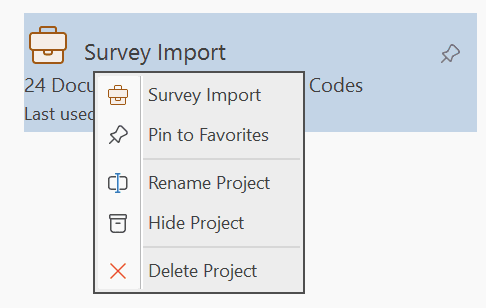
If you have lots of projects, you can hide those that you do not need at the moment. You can switch between showing all projects or only those that are currently not hidden. See the Show all projects option.
Other options in the context menu are to open a project, to pin it to the favorite list, to rename a project, or to delete a project. A pinned project is listed in a separate section above the list with all other projects.
If you delete a project, it is deleted permanently. It cannot be recovered. If you still want to have access to the project at a later time, make sure that you export it first and store a project bundle file at a secure location.
Welcome Screen (right-hand side)
On the right-hand side of the Welcome Screen, you have access to useful information and resources:
- News about current workshops, updates, newsletters, interesting articles, etc.
- Resources Quick Tour, User Manual and sample projects
- Video Tutorial: Learn ATLAS.ti quickly by watching our video tutorials that walk you through the entire process from project creation to analysis and reporting step by step.
If you rather use this space to view the list of your projects, you can click on the button with the right-arrow.
If you want to see the screen with the news and resources again, click on the button with the left-arrow.